• About US & Thistle Dew Books
  • Book Shoppe
  • COPYRIGHT NOTICE
  • Emporium
  • Farm Photos
  • Historic Interpretation
  • List of Articles on TheHistoricFoodie’s Blog
  • Motorcycles are Everywhere, Please Drive Safely©
  • PROGRAMS, DEMONSTRATIONS & LECTURES: Martin and Vickie Can Provide

Thehistoricfoodie's Blog

~ An enjoyable ramble through the world of Historic Foods and Cooking to include Gardening History, Poultry History, Dress, and All Manner of Material Culture.[©]

Thehistoricfoodie's Blog

Category Archives: Uncategorized

Waffles: Before Eggo

30 Tuesday Aug 2022

Posted by thehistoricfoodie in Uncategorized

≈ Leave a comment

Tags

18th century food, colonial foods, historic foods, period foods, waffle history

My article on the history of waffles is in the current issue of Early American Life. The magazine is available from Firelands Publishing or online if you are unable to find it at your favorite news-stand. Martin and I enjoyed making waffles in the July heat in the deep south (smile). We are very thankful to Buena Vista Mansion for allowing us to use the home for the photo shoot, and to Kim McKinley for taking the photos.

Advertisement

Eighteenth Century Ketchup: The Worcestershire of Today

30 Tuesday Aug 2022

Posted by thehistoricfoodie in Uncategorized

≈ Leave a comment

Tags

18th century food, colonial foods, historic foods, period foods

My article will eventually end up somewhere so I can’t share too much here, but needless to say Ketchup was not always what we see today. It was most often made of mushrooms, followed by young green walnuts, etc., but by 1795 tomato ketchup is documented. It is not thick, not sweet, and absolutely nothing like modern ketchup. It did appear on tables in caster sets, but was primarily used to season foods while cooking, much as we use Worcestershire sauce today.

GENEALOGY AND HISTORICAL RESEARCHERS

23 Saturday Jul 2022

Posted by thehistoricfoodie in Uncategorized

≈ Leave a comment

We can do your family research!

Victoria Brady has been a genealogist for 30+ years and has written books on her family and on her husband, Martin Brady’s, family.  She has completed the DAR genealogy courses and attended countless workshops over the years. 

She has done genealogy for people to satisfy their curiosity as well as to prepare the documentation to join various lineage societies.

*As with all such service providers, results are not guaranteed.  You determine when to end the search, however, a minimum of one hour is required, and services are provided in one-hour increments.  Hourly rate $35. Paypal accepted.  

We can research any historical topic!

We have over 30 years-experience researching any number of historic topics and have had articles published in newsletters, magazines, and books.  Vickie has even done a live cooking demonstration on national TV! Whether you want to know what kind of socks were worn in 1700, what your ancestors ate, or need help documenting an obscure activity or everyday item for an article you are writing, we are available to help. 

Jerusalem Artichokes: Tasty Tubers, Pretty Flowers©

07 Wednesday Oct 2020

Posted by thehistoricfoodie in Uncategorized

≈ 1 Comment

John Parkinson, English herbalist and Botanist described the sunchoke in 1729 as being widely grown and having grown very common in London. In 1720, Edward Phillips defined it as a plant near of the same nature as potatoes.

Most people know that the Jerusalem Artichoke, aka sunchoke, Canadian truffle, or potatoes of Canada, or the French is “topinambour” an American plant eaten by Native Americans, colonists, and which continued in use until roughly after the Great Depression when it fell mostly out of favor, becoming viewed as poor man’s food by those who lived off what they could harvest around their homes and farms.

Nehemiah Grew, M.D. and Fellow of the Royal Society published in London, “IDEA of a Phytological History Propounded. Together with a Continuation of the Anatomy of Vegetables Particularly Professed upon Roots and an Account of the Vegetation of Roots”, in 1673 in which he included the Jerusalem Artichoke which came to England from the Americas.

“The Jerusalem artichoke is a hardy tuberous-rooted perennial plant, a species of the family of Helianthus or Sun-flower, growing with a cluster of large irregular, tuberous, fleshy roots, which are the eatable parts; in best perfection in autumn and winter, till the spring; shoots up tall single stems annually in the spring, several feet high, furnished with large broad leaves, and crowned by a smallish, radiated, yellow, compound flower; is raised by cuttings of the roots, or whole; planted in the spring, one crop annually, in rows a yard distance; and the roots attain perfection the same year, about September or October, continuing good all winter till April or May, then begin to sprout, waste, and decay.” – Abercrombie, John. “The Complete Kitchen Gardener, and Hot-Bed Forcer”. 1789.

Explorer and French colonist Samuel de Champlain took the plant to France and Lewis and Clark ate them on their grand exploration.

In 1847, a gentleman shipped four bushels of the tubers to the editor of “The Farmer and Mechanic” magazine hoping they could be shipped to Ireland for planting to alleviate the suffering caused from the potato famine.

Every account encountered says these are impossible to eradicate after starting, however, I just put out my third planting and have struggled to get them to grow. From what I planted last year I had three plants this year. The flowers are quite nice, a sunny yellow with yellow centers, and about six feet tall.

They may be cooked any way the potato can, i.e. soup (called Palestine Soup), fritters, souffle, fried chips, boiled, devilled chips, Lyonnaise, mashed, pan fried with onions, cooked with white or cream sauce, au-gratin, salad, and pickled. Always slice them into salted water with lemon juice to prevent darkening. Drain and pat dry before frying.

Jerusalem Artichoke salad is made by layering sliced boiled sunchokes and onion, and dressing with mayonnaise or oil and vinegar.

Fritters: Boil the sunchokes not more than 15 minutes, slice them ¼ inch thick, dip in flour and fry till a golden brown.

Fried: Scrape and wash the sunchokes, slice or cut like French fries, deep fry until golden brown, serve with lemon juice or butter.

When is a Pumpkin Not a Pumpkin?©

02 Friday Oct 2020

Posted by thehistoricfoodie in Uncategorized

≈ 2 Comments

Tags

pie pumpkin

Have you seen the somewhat comical posts going around facebook in which the poster feigns horror to find out her canned Libby’s pumpkin is not “actually pumpkin”?  If not, you will so let’s go ahead and have “the” talk about squash that all good cooks and gardeners must have at some point in life.

Squash, pumpkins, and some gourds all belong to the same family of plants – Curcurbitaceae.  Both are rambling vines which produce large, heavy, usually some shade of orange though some remain green or mottled, fruits.  They all have both male and female flowers, and both are necessary for producing fruit.  Frankly, the genetic makeup of pumpkins and what we call winter squash is virtually the same.

While we’re compiling this genealogy chart let us not forget that squashes, gourds, and pumpkins are also  related to melons and cucumbers, so closely related, in fact, all will “cross” if planted too closely together.  When this happens, the seeds will not produce true to the host plant, and instead of a fine sweet melon you may end up with an insipid Franken-melon.

There are large pumpkins used to make jack-o-lanterns or for feeding farm animals and there are others which are much better for pies.  Squash pie made from winter squash is quite common.

These plants fall into one of the following categories:  Curcurbita maxima, C. moschata, and C. pepo.  Maxima usually produces large fruits with round thick stems that are harvested in the fall.  Moschata has round stems and is usually harvested as a mature winter squash.  Pepo is a summer squash like zucchini or crookneck.  Delicious they may be but not necessarily good for making pies or sweetbread.

Now that everything is clear as mud let’s look at that orange stuff in the can.  Libby’s says their canned pumpkin is Dickinson squash – it looks like a pumpkin but is a squash as are all pumpkins.  It is a moschata type plant that produces tan colored squash that weigh between 10 and 40 lbs. when ripe.  They are more oblong than round or squat.  The flesh is thick, sweeter than field pumpkin, and dry making it ideal for those famous holiday pies.  A curcurbit that is too moist will never produce pie filling as good or as thick as one with drier and sweeter flesh. 

For you gardeners, remember chunks of pumpkin can well, and cooked puree freezes well.  

Dickinson thrives in hot weather, it keeps for months after harvesting, and moschata are thought to be less bothered by humidity, heat, disease, and those pesky squash borers than maxima or pepo so what’s not to love?

Where this tale gets twisted is researching the origin of Dickinson pumpkins.  The internet is full of bloggers and seed companies who claim this fruit dates from between 1795 and 1835, and that it was developed by Elijah Dickinson, but after an exhaustive search I’m unable to find any primary source documentation to support these dates or the first name of the breeder.  In fact, the first mention I was able to locate for Dickinson Pumpkin (or Squash) was 1946.

Some notable publications where the elusive Dickinson pumpkin was not found include: 

“The Tennessee Farmer”.  1836.

“The American Farmer’s New and Universal Hand-Book”.  1854.  Philadelphia.

Burr, Fearing.  “Garden Vegetables, and How to Cultivate Them”.  1866.  Boston.

“The Farm Journal”.  May 1855.

“Southern Planter”.  1843.

“The American Farmer’s New and Universal Handbook”.  1869. Philadelphia. 

“Proceedings”.  Iowa State Horticultural Society.  1893.

1900 U.S.D.A. Farmer’s Bulletin No. 2086, article on pumpkin varieties.

Until, or unless, someone shares a primary source to support the late 18th and early 19th century origins, I’m going to boldly say the Dickinson became a distinctive variety during the 1940s and 50s.  It was most likely simply a local variety grown near the Illinois Dickinson cannery that opened about 1895.  It probably took on a whole new level of importance after Libby bought the cannery and began marketing canned pumpkin. 

The answer to when is a pumpkin not a pumpkin is, obviously, when it’s a squash!  Pumpkin IS a type of squash and botanically speaking they’re the same.  Seeds are available for Dickinson and other pie pumpkins for the gardener.  They make nice pies as do butternut, Georgia Candy Roaster, sugar pie pumpkin, Cinderella pumpkin, Musquee de Provence and some of their closely related cousins.   Choose Libby’s for a quick puree or a sweeter, drier variety of winter squash and bake or stew it down with as little water as possible if you’re nutty enough to enjoy growing your own.  Just don’t forget the whipped cream.    

Seed Saving: Grandpa was Frugal©

17 Monday Aug 2020

Posted by thehistoricfoodie in Heirloom seed, seed saving, Self-sufficiency, Uncategorized

≈ Leave a comment

117704567_10218116178235651_3742915755239741638_n

Only save seeds from open-pollinated varieties, hybrids do not carry true from one generation to the next.  Only save seed from mature fruit/vegetables.  Seed maturity is not the same as market maturity in all produce.  To save carrot seed the plant should be a year old and three to four feet tall, whereas seed from a market cantaloupe can be saved.

Seed Savers Exchange offers a primo chart for seed maturity at https://www.seedsavers.org/site/pdf/Seed%20Saving%20Guide_2017.pdf

To insure seed quality be mindful of planting two or more varieties within a close enough distance for them to cross pollinate in which case the fruit produced from those seed won’t produce true.

For very small seed the entire seed head can be tied in a see-through cloth bag of organza which keeps the seeds contained until cut from the plant (purchase or make your own).  Bags are helpful for keeping varieties from crossing as well. These bags can be washed and reused many times.

Always clean the seeds of debris before storing in a cool, dark place in an air-tight container, ideally the refrigerator or freezer.  It is a good idea to test your seed for germination by placing them between layers of paper towel that are kept well moistened before storing them away.

Separate the seed from any connective matter, in most cases, wash them, then drain well and allow to dry, stirring with the fingers occasionally.  When thoroughly dried, put into paper packets/envelopes, write the variety and the year the seeds are harvested on the packet, and place the packets into a sealed container (jar, tightly sealed bowl, vacuum sealed packs).

Small seeds will stick to paper towels becoming difficult to remove after they are dry.  Coffee filters work better or place them on the paper towel for only a few minutes to absorb excess water, then spread on a plate or saucer or dry coffee filter to finish drying.

Asparagus varieties may produce large round seed which can be saved to start new plants.  This is a slow process, but with free seeds what’s to lose?  The seeds will turn from green to red then brown, although they usually fall off the plant before the brown stage.  The stem can be put into a seed bag which will allow the seeds to fully mature yet be contained should they fall off on their own then.

 asparagus-seed

Basil seed can be collected using a seed saver bag or by diligently watching the seed heads and snipping them off before the seed begin to separate on their own.

Beans & Peas kept for seed should have brown, dry, and brittle pods.  The higher the humidity the greater the chance of mold and mildew spoiling the seeds.  In a particularly wet year the plants can be pulled and hung up in a dry place to finish maturing.  Sugar snap peas can be left on the vines until they are dried.

Broccoli and brassicas will bolt if left long enough producing multiple seed pods.  Each pod contains several seed.  The dried pods can be gathered and allowed to dry further before removing the seed from the pod.  When the pods reach a certain maturity the seed often fall out on their own, so it is a good idea to lay them on a clean cloth or put them in a paper bag to dry.

Carrots produce seed heads that look like the flowers from Queen Anne’s lace which is, in fact, related.  Enclose the seed head in seed saver bags until fully dried.  OP varieties:  Danvers, Dragon, Oxheart, Paris Market, Red Cored Chantenay, Scarlet Nantes, St. Valery.

800px-Daucus_carota_flowers,_peen_'Napoli'_(1)  
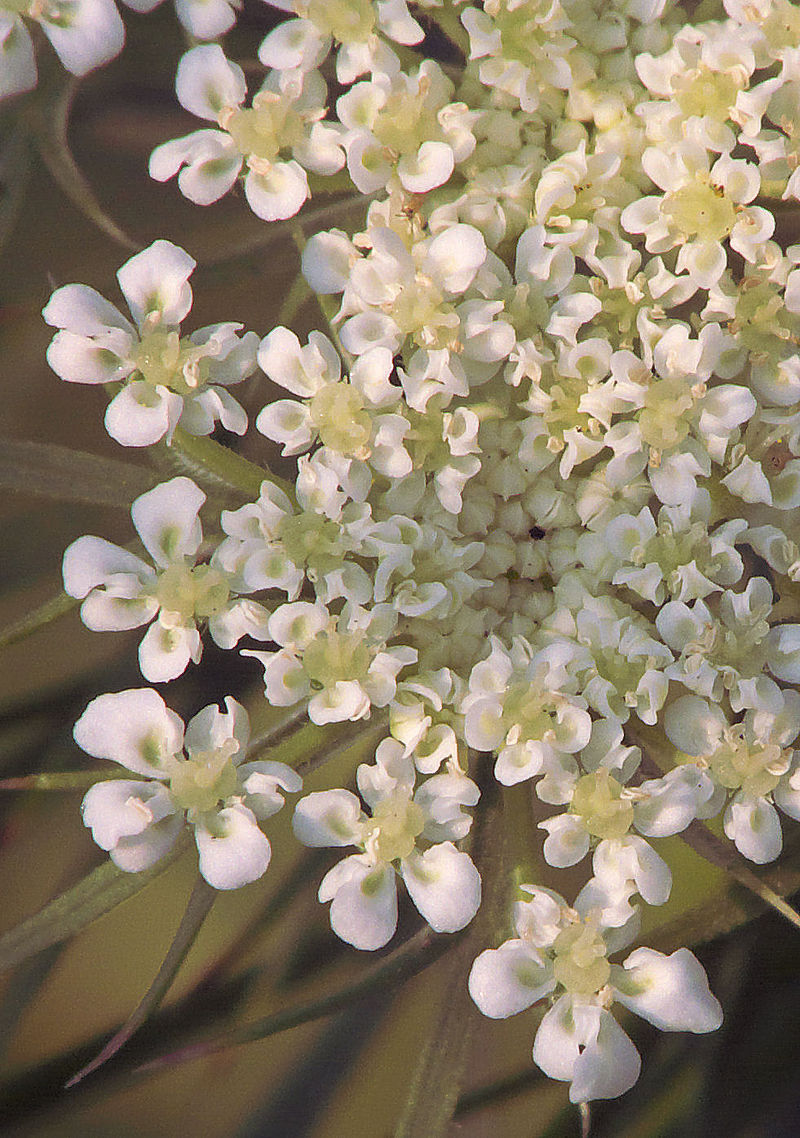
Closeup of carrot flower cluster

Cilantro seeds can be used to season food (they are coriander seeds) or used to plant.  Often, they will fall on the ground and reseed with no help from gardeners.

Collards are saved like broccoli.  OPvarieties:  GA Southern, Morris Heading

Corn should dry on the stalk until perfectly dry.

Cucumbers for saving seeds should be allowed to yellow on the vine.  Discard any seeds that aren’t plump and harder than the immature seed.  OP varieties:  Space master, Cucamelon, Sweet Market More, Boston Pickling, Lemon, Chicago Pickling, Japanese Long, Muncher.

Dill seed heads are a familiar sight and smell.  To save seed for planting encase the seed head in seed saver bags and leave on the plant until the seed have matured.

Eggplants should be turning brown and the seeds should be hard and crunchy.  Leave one or two fruits on the plant while continuing to harvest the others.  To collect the seed cut the eggplant in half then break it into small pieces.  Cutting can damage the small seed while breaking it up will leave the seeds intact.  OP variety:  Black Beauty.

117766400_10218116177475632_8342338463456701056_n  Front left:  eggplant seed.  The red cayenne pepper is ready for seed harvest, the jalapeno seeds would not be mature yet.  The bowl in back contains cucuzza seed.

Marigold seed can be harvested from flowers that have dried on the plant.  Dead-heading will keep the plant flowering longer.

Melons are harvested as normally (when the stem dries, and the melon is easily pulled), and the hard, mature seeds are rinsed, and dried.  Melons do not have to mature beyond the eating stage to save seed.  Mature seed will sink when dropped into water.  Throw away any floaters.

Mustard seeds are saved like broccoli and other brassicas.  OP varieties:  Southern Giant Curled, Magma, Leaf Heading.

Okra pods should be left on the plant until they are completely dried, then break apart and sort out the seed.  If uncertain, watch them until you see the pods begin to split and then harvest the seed.

Onions will produce a round seed head which can be placed inside a seed savers bag and allowed to dry on the plant.  When the flower head has dried, and small black seed are visible the seeds can be shaken out onto a clean cloth.  “Walking” onions produce a cluster of new “starts” which can be pulled apart and each one planted to produce a new plant.
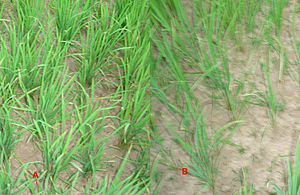
f593653ab642082175873b7e6679b527  Walking onion

Peppers are ready to save for seed when the fruit reaches its final color – for cayenne and jalapeno this is deep bright red.  For some bell peppers this can be yellow, orange, etc.  Open the pepper, and with your finger, strip out the seed.  Either wear gloves or wash hands thoroughly after deseeding hot peppers.  What is left after the seeds are removed can be dried and kept for seasoning.

Pumpkin seeds are saved like squash.  OP varieties:  Small Sugar, Seminole, Amish Pie, Cornfield, Rouge Vif D’Etampes. Long Island Cheese.

Radishes will bolt and form seed pods if left in the ground.  Allow the seed pods to thoroughly dry then separate out the seeds.  The green pods can be pickled also.  OP varieties:  China Rose, Watermelon, Spanish Round Black, Spanish Long Black, Early Scarlet Globe, French Breakfast, Philadelphia White Box, White Hailstone, Daikon.

Squash seeds can be saved from summer or winter varieties.  Leave summer squash on the vine until they become large with a hard rind.  The squash can be stored in a cool dry place for a few days to weeks to allow the seeds to further mature.  Seed can be harvested from winter squash, such as Butternut, when picked to cook.

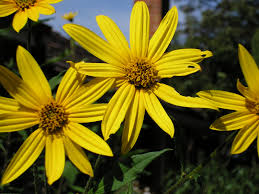
Sunflowers are ready to harvest seeds for planting when the plants have died back, and the backs of the blooms have browned.  Cut the stalk about a foot down from the flower head.  Place it in a container to catch loose seeds.  If you determine a seed head isn’t quite as dry as you thought, just hang it up in a dry place for a week or so to finish drying.  OP varieties:  Mammoth Russian, Giant Primrose, Irish Eyes, Lemon, Arikara, Autumn Beauty, Valentine, Velvet Queen, etc.

Tomato seed are ready to harvest when the tomatoes are ready to eat.  Simply squeeze out the seed.  My family dried them at this point, however, for better germination, put the seed and pulp into a jar with about as much water.  Cover loosely with a cloth or cheesecloth and allow to sit 2 to 5 days (the process is quicker at higher temps).  Pour off the water, drain well and spread out to dry.  Note:  It is advisable to wash, or allow these seed to ferment, to remove the coating which can reduce germination.  Pour off the water, any floating seeds, and any mold that is floating on top.  Add fresh water, let the seeds settle, and repeat until the water is clear.  Drain well and spread the seeds out to dry.

Zinna seed are easy to harvest from dried flowers.  Pull the seed out of the flower and remove the petal from the arrowhead shaped seeds.  Allow to dry completely before storing.

Zucchini seed are harvested for planting like squash.  Allow to grow very large and the skin to harden.  The zucchini can be stored two to three weeks allowing the seeds to mature further before breaking or cutting the zucchini open and scooping out the seed.

As always, I leave you with wishes for Blissful Meals and Happy Gardening. ©

Upland Rice for Home Production©

14 Friday Aug 2020

Posted by thehistoricfoodie in 17th century food, 18th century food, 19th century food, gardening, Self-sufficiency, Uncategorized, Upland rice

≈ Leave a comment

300px-Upland_rice_differences

Rice might not come to mind when discussing American food crops, however, it has been grown here since the late 1600s.  There are two types of rice – one is an aquatic “lowland rice” and the other is “upland rice”.  The primary reason for growing in water is weed control – rice grows in water while weeds do not.  Upland rice will grow with decent rainfall much as do cotton or corn.

Rice has been grown primarily in South Carolina, Georgia, Louisiana, Texas, and western Tennessee but they are not the only states with a rice culture.  Today rice is grown commercially primarily in Arkansas (the U.S.’s top producer), California, Missouri, South Carolina, Georgia, Louisiana, and Texas but has been successfully grown in Florida and as far north as Vermont and Maryland.  Cooler climates will need to start the rice in seed trays and transplant the plugs when plants are at about three weeks growth.

The origin of rice growth in America dates from 17th century South Carolina.  “The cultivation of rice spread rapidly from the beginning into most of the Southern States, and even so far north as Missouri, Tennessee, and Illinois.”

Upland rice culture in Mobile was reported in the American Farmer in January 1824.  The author stated he saw no real difference in the bearded rice and the smooth and grew both.  He noted the bearded had a larger head and larger grain and he felt it was far more productive.

Upland rice was submitted by a farmer in Grand Bay, Alabama which met with praise from the proprietor of the Empire Parish Mill in New Orleans in 1871.  “The rice sent by you to our mill will compare favorably, as to the grade and yield, with the best ever raised in Louisiana and will command the highest price in our market”.

“All qualities and descriptions of land have been sown in rice, from the stiffest of clays to the lightest sands, with apparently equally profitable results…”.

South Carolina planters said in 1851 that they planted the upland rice and cared for it just as they had corn but thought the rice produced more food for their families.  Crab grass could choke out the rice until it grows large enough in a few weeks to make do on its own.  The same writer noted that the rice was as easily transplanted as onions.

Upland rice culture was rapidly increasing in all the flat country bordering the Gulf and Atlantic in the 1870s with some saying the white was the best for upland areas while the famous gold rice of South Carolina and Georgia was the best for water culture.

Growers reported that following the War Between the States as Louisiana’s sugar production plummeted, the production of rice exploded from 7,000 to nearly 30,000 barrels.  Comments on the successful production of upland rice as good as, “that which is raised in the swamps of Georgia and South Carolina”, were found in numerous publications including “The Southern Farmer”.

“This has been proved beyond a question in Alabama where for many years upland rice has been raised with great success, yielding 50 to 100 bushels of shelled rice (rice with the husk on) to the acre…The big white, little white, and the red-bearded all do well on upland.”

Early on, South Alabama did not have facilities to process rice necessitating shipping to and from New Orleans, however, by 1871 it was said, “the cleaning or hulling can be easily performed with an ordinary pestle and mortar, and at very little expense three or four of these pestles and mortars could be so constructed to be run by the gin power which would clean a large crop with great expedition.”

In warmer climates, sow the seed where it is to grow after soaking in water for between one and five days, changing the water daily.  Plant one ounce of seed per 100 square feet soon after the last expected frost date.  There should be about four seedlings per foot with rows a foot apart.  Plan to use bird netting on T-posts over your crop so it doesn’t become bird food.  As with any open pollinated seed one can save seed from this year’s crop to plant again next year.

Harvest begins in late summer after the seed heads turn brown.  Cut the stalks and hang them up in a dry place to dry.  Thresh it as soon as it is dried.

Remove the rice from the stalk with a flail or by beating the stalks together over a clean sheet or piece of plastic or put the seed heads into a five-gallon bucket and use a drill with a paint stirrer attachment to separate the grains.  (Insert the stirrer through a hole in the bucket lid so the rice doesn’t fly out everywhere).  Scoop up the rice and drop it with a fan blowing to separate and blow away the chaff.  Spread the rice in the sun to dry or it can be dried in a low temperature oven.

An article published in 1924 touches on hulling rice.  “The hulls are removed by passing the grains between revolving millstones, set apart about two-thirds the length of a rice kernel…”.  The idea is to strip off the hull without crushing the rice grains.

aged-cajun-woman-using-crude-mortar-and-pestle-in-process-of-hulling-rice-near-1024

For home production the hulls can be removed by pounding with a rubber mallet or using a large old-fashioned mortar and pestle.  There are plans online for making an apparatus to do this and, sites offer hullers for purchase starting at roughly $150 on Amazon.  Some of the expensive grain mills can utilize a de-hulling attachment.  The attachment itself is $275.

rice hulling machine

The hulls may be used as mulch, soil conditioner, bedding for poultry, insulation, etc.  Rice straw can be used as feed, bedding for animals, mulch, and fertilizer.  From the “Mobile Register”, quoted in “Southern Farm and Home March 1873:  “…if you do not [have a hulling mill nearby] it will still pay you to grow it as a feed crop, for it bears two cuttings in the year below 32° north latitude and makes a hay which sheep, horses, and cattle prefer to the best grass product grown”.

In the following video we first see a demo of the huller being used followed by instructions on how to build it.  https://www.youtube.com/watch?v=YxWI5Mvw36Y.  https://www.youtube.com/watch?v=xpZxS3QoWTE shows the same machine with a motor attached.

This huller is made from a bench grinder.  One wooden grinding wheel stays stationery while the other is turned by the bench grinder.  There are some in use in third world countries that utilize one such grinding wheel turning against a plain rubber wheel.  https://www.youtube.com/watch?v=-fnP-y8_Asg

A manual on growing upland rice: http://www.fao.org/fileadmin/user_upload/ivc/docs/uplandrice.pdf

Seed may be purchased from Nature and Nurture Seeds, AmkhaSeed in Colorado, Experimental Farm Network (as nonprofit in Philadelphia), Sherck Seeds in Indiana, Fedco Seeds, Wild Folk Farm in Maine (they do sell varieties suited to the South as well), Southern Exposure Seed Exchange (they also have a tutorial for growing upland rice), etc.

The Carolina Gold rice seed offered by Baker Creek is a paddy type rice requiring flooding for cultivation.

Blissful Meals and Enjoyable Gardening should readers want to try their hand at rice culture!

“Dutch” Case-knife Beans: A Taste of History©

01 Wednesday Jul 2020

Posted by thehistoricfoodie in 17th century food, 18th century clothing, 19th century food, Colonial foods, gardening, Heirloom seed, historic food, Uncategorized

≈ Leave a comment

Tags

case-knife beans

Palatine June bean

Photo:  William Woys Weaver, Roughwood Seed Collection

I once had someone who was viewed as an amateur historian tell me that people did not eat dried beans in the 18th century.  What?  I’ve never forgotten that and today we will debunk that theory.

The earliest description this writer found for a white-seeded bean that matches the description of what was later called the case-knife bean was written by Nicholas Culpepper in 1666.  “…but white is most usual; after which come long and slender flat cods, some crooked, some straight, with a string as it were running down the back thereof, wherein are contained flattish round fruit made to the fashion of a kidney…”.

Amelia Simmons was perhaps the earliest cookery book writer to document white beans for drying (1796) and Simmons listed a “clapboard” bean which some think was the case-knife.  She advised they must be poled and were, “the easiest cultivated and collected, are good for string beans, will shell”.

Philip Miller said in 1775 the Dutch White Beans were much the sweetest for the table.  He thought them “extream [sic] windy Meat” and recommended preparing them in the Dutch fashion of half boiling them then “you husk them and stew them… they are wholesome food”.

John Reid wrote of beans in 1683, “Beans and peas boyled with savory and thym[e]…served up with sweet butter beat amongst them and set a little on a coal or chaffing boyl [sic]”.  – “The Scots Gard’ner”.

A farmer wrote in 1840 that the “prettiest” way to grow dry beans was to raise white pole beans and, “The common case-knife beans are excellent for this purpose”.  Twenty-three years later Fearing Burr told his readers the case-knife was “common to almost every garden” and it remained so into the early 20th century.  Today the white-seeded variety of case-knife bean isn’t as common, at least by that name, but close versions can be found.

“Some Dutch case-knife beans did come up and grew finely…In good time they were heavily loaded, and they were of rich and splendid flavor, so much so I forbade wife cooking any more, having visions of acres of beans and a big bank account”.  One will pity this poor farmer when he explained that a mere few days before he went to pick his dried beans they had been beset upon by weevils.

“The manner of saving the seeds of these plants, is to let a few rows of them remain ungathered in the height of the season; for if you gather from the plants for some time, and afterwards leave the remaining for seed, their pods will not be near so long and handsome, nor will the seed be so good.  In autumn, when you find they are ripe, you should in a dry season pull up the plants and spread them abroad to dry; after which you may thresh out the seed and preserve it in a dry place for use”.  – Miller, Philip.  “The Gardener’s Dictionary”.  1768.

Buist [1805-1880] proclaimed the Dutch Case-knife to be an excellent pole bean producing a good crop of fine flavor and much earlier for the table than either the Lima or Carolina.  “It can be used either in or without the pod; it is also adapted for winter use”.

Mr. W. F.  Massey submitted information on white beans and their culture in the hot humid South for the Southern Planter and Farmer in 1900 saying they produced more damaged beans than when planted in the North.  He stated the best white beans he’d ever tried growing in the South were the Dutch Case-Knife beans.  “This is a pole bean, but not a rampant climber, and in my boyhood was commonly planted in the corn field and allowed to climb on the stalks in a portion of the field so as to give a supply for shelling in winter.  It is a flat bean, similar in shape to a small lima, but smaller still.  There is no shelled bean of better quality.”

As for the method of growing these beans they could be trellised or staked.  The following would make a nicer presentation than row staking.  “Strike out a dozen (or more) circles on the ground, as large as a cart wheel.  Put a wheel barrow load of manure into it and spade it up with the earth.  Drop the seeds in the circle, on the outer edge of the hill, say six inches apart.  Then insert eight or ten poles just within the circle, at equal distances from each other, and tie the tops of the whole together-forming a cone.  Cover up the seed and wait the result.

Each of these hills will yield you a peck or a half bushel of dry beans next fall—which if you have but a dozen such hills, will give you, perhaps half a dozen bushels.  This will be enough for your purpose.  By this course, but a little land is occupied.  Pole beans will yield very much more abundantly than bush beans, and occupy air, whilst the latter must have the surface of the earth”.  – Holmes, Frances.  “The Southern Farmer and Market Gardener”.  1842.

This bean was often referred to as Old Dutch White or White Dutch and differs from the brown-seeded variety sometimes sold as Caseknife today.  Old cookery books and garden manuals refer to white beans, small white beans, large white beans and great white beans.  All agree the white was preferred.

Dr. William Woys Weaver says the Caseknife Bean is perhaps the oldest documented bean in American gardens.  Like the farmers quoted above he believes the oldest were white seeded like those grown in the gardens of Thomas Jefferson and the closest variety to the original bean is the Pelzer Schwertebuhne (Palatine Caseknife Pole Bean).  He found the beans being grown by the Wendel family of Weilerbach in the Rheinland-Pfalz.  He offers the Palatine June Pole Bean in his Roughwood Seed Collection.

As to cooking dried white beans, let’s look at Louis Eustache Ude’s 1814 receipt.

White Beans a la Maitre d’Hotel.  “if they are dry, they must be soaked for an hour in cold water, before you boil them.  Then boil them in cold water and replenish with cold water also which makes the rind or coat tender.  White beans must be well done before you dress them, which is done as follows:  trim a stew-pan with a quarter of a pound of fresh butter, a little parsley chopped very fine, and some pepper and salt, over which lay the beans, well drained.  Keep moving the stew-pan without using a spoon, for fear of crumbling the beans.  Then squeeze the juice of half a lemon and send up quite hot”.

The Shop at Monticello offers seeds of the Caseknife Pole Bean which have white seed like the original and the flattened, slightly curving shape of the beans matches the description above.  They are grown out on-site.  A packet contains between 20 to 25 seeds and sells for $3.95 plus shipping.  1-800-243-1743.

Johnson’s Home and Garden offers “Old Dutch White Half Runner Bean” seed he says were brought from Germany by original settlers of the Dutch Fork Section of South Carolina.  A Half Pound of untreated seed is $3.95 and a pound is $5.95.  Johnson’s Home & Garden, 130 Power Drive, Pikeville, KY 41501, phone                   606-432-8460.

Roughwood Seed Collection:  https://www.roughwoodtable.org/roughwood-seed-collection offers the Palatine June bean seed.

BRADY’S FAITHFUL REPRODUCTIONS

02 Monday Mar 2020

Posted by thehistoricfoodie in Uncategorized

≈ 1 Comment

Those of you interested in general 18th century history, including reproduction items we make and offer for sale from time to time, may want to check out our new blog: https://bradysfaithfulreproductions.com/ or search bradysfaithfulreproductions (without the apostrophe).

Thank you for your continuing interest.

  • Victoria Brady, thehistoricfoodie

aps,840x830,small,transparent-pad,1000x1000,f8f8f8

WORK BAGS AND THEIR USES©

18 Thursday Jul 2019

Posted by thehistoricfoodie in 18th century material culture, Early family life, early household items, Uncategorized

≈ 1 Comment

Tags

knitting bag, sewing bag, workbag

Gentle readers, today’s post departs from gardening and cooking as sometimes happens.  I hope that some of you find it useful.

b80cbea837bc84b0121e37c04d6249ac

To research an 18th or 19th century lady’s collection of sewing implements it helps to know what the collection was called during that time. While one can research individual tools, the container that held them, always ready for easy availability, was most often called a work bag. References are found from articles and books published as early as the 1700’s.

kristmro@gmail.com.65D74E942C1791EB2F42533499C2518D.5072 (1)

It was important that every woman knew how to sew and embroidery. More well-to-do women and girls might have worked on more delicate garments and smaller fancy items such as handkerchiefs, doll clothes, or delicate underpinnings, but they were still expected to perfect their sewing skills. Most girls learned embroidery stitches by making samplers.

Work-bags ranged from strictly utilitarian to being knitted or made of satin and decorated with tassels, embroidery, and other embellishments and were often made to give as gifts to a friend or loved one. They were often made to sell at church bazaars.

180150c46f459540fe8bba43a60ecac4

Women commonly carried work-bags with them as they visited friends, sometimes working on their needlework as they carried on their conversations. Young girls often had their own workbags.

“. . . and brought, for each of the little girls, a present of a sattin [sic] work-bag ornamented with gold. There was in each bag a needle-book, and a piece of muslin, on which was drawn a pretty design”.

godeysladysbook100hale_0944

In addition to sewing tools a work bag was also used to carry everyday items as one might use a tote bag today. It might have contained items such as keys, a piece of jewelry, letters or notes, money, toothpick cases, books, sewing, knitting, or embroidery projects, gloves, handkerchief, etc. or it may, on occasion, have been used to gather nuts or flowers. A housewife (a sewn sewing kit of sorts used for holding pins, needles, buttons, etc.) was often part of the contents of a workbag. In 1841 an article was published about the early use of potatoes in which a woman of 45 years said the first potato they ever saw was kept in her mother’s work-bag to await the season for planting.

Reading material and calling cards were often kept in work-bags. “I did intend reading something to the children,” said their mother, as she drew a paper from her work-bag”. The work bags also held scissors, a bodkin, and needles.
7030356049d6900b8146f716c430caaf

Sewing is done by choice today but in times past clothes were made and mended and the tools to do the job were in constant use. A woman valued them because replacing them was a hardship. A poem [published 1831] entitled “Careless Matilda” addresses a young lady who haphazardly leaves her sewing tools scattered about, never knowing where anything is.

“Again, Matilda, is your work astray,
Your thimble gone! Your scissors, where are they?
Your needles, pins, your thread, and tapes all lost—
Your Housewife here, and there your work bag tost [tossed]”.

The following quote demonstrates the importance of carefully storing away a work-bag for the next time it was needed. “. . . then Lucy’s mother kissed her, and said to her, put your work into your work-bag, and put your work-bag into its place, and then come back to me.”

My workbag is made of toile after a pattern published in Godey’s Lady’s Book. It is a good size with pockets sewn around for keeping various items together. It has a drawstring closure. It has held everything documented above at one time or another. Researching workbags reminded me how much I need to reorganize mine and be as faithful about keeping my sewing implements together in it as my predecessors were. At my age one would hope to be better organized than I generally am.

← Older posts

Archives

  • August 2022 (2)
  • July 2022 (1)
  • April 2022 (1)
  • February 2022 (1)
  • October 2020 (2)
  • August 2020 (2)
  • July 2020 (2)
  • March 2020 (1)
  • July 2019 (1)
  • March 2019 (1)
  • February 2019 (4)
  • January 2019 (1)
  • October 2018 (1)
  • September 2018 (1)
  • August 2018 (2)
  • July 2018 (1)
  • June 2018 (2)
  • May 2018 (3)
  • April 2018 (2)
  • March 2018 (7)
  • February 2018 (1)
  • December 2017 (3)
  • November 2017 (1)
  • September 2017 (2)
  • June 2017 (1)
  • May 2017 (1)
  • March 2017 (1)
  • February 2017 (4)
  • January 2017 (1)
  • December 2016 (2)
  • October 2016 (2)
  • August 2016 (5)
  • July 2016 (2)
  • June 2016 (3)
  • May 2016 (7)
  • February 2016 (1)
  • January 2016 (8)
  • September 2015 (2)
  • July 2015 (1)
  • February 2015 (3)
  • January 2015 (2)
  • December 2014 (1)
  • November 2014 (2)
  • October 2014 (3)
  • August 2014 (6)
  • July 2014 (8)
  • June 2014 (8)
  • May 2014 (11)
  • April 2014 (4)
  • March 2014 (5)
  • February 2014 (4)
  • January 2014 (4)
  • December 2013 (3)
  • November 2013 (2)
  • October 2013 (4)
  • September 2013 (8)
  • August 2013 (1)
  • July 2013 (10)
  • June 2013 (2)
  • May 2013 (3)
  • April 2013 (10)
  • March 2013 (4)
  • February 2013 (3)
  • January 2013 (13)
  • December 2012 (13)
  • November 2012 (4)
  • October 2012 (1)
  • August 2012 (3)
  • July 2012 (12)
  • June 2012 (5)
  • May 2012 (5)
  • April 2012 (4)
  • March 2012 (8)
  • February 2012 (1)
  • January 2012 (5)
  • December 2011 (10)
  • November 2011 (2)
  • October 2011 (3)
  • September 2011 (4)
  • August 2011 (7)
  • July 2011 (10)
  • June 2011 (6)
  • May 2011 (1)
  • March 2011 (1)
  • December 2010 (2)
  • November 2010 (2)
  • October 2010 (3)
  • December 2009 (1)
  • June 2009 (13)
  • May 2009 (10)
  • April 2009 (9)
  • March 2009 (1)

Enter your email address to subscribe to this blog and receive notifications of new posts by email.

Join 526 other subscribers

Create a free website or blog at WordPress.com.

Privacy & Cookies: This site uses cookies. By continuing to use this website, you agree to their use.
To find out more, including how to control cookies, see here: Cookie Policy
  • Follow Following
    • Thehistoricfoodie's Blog
    • Join 478 other followers
    • Already have a WordPress.com account? Log in now.
    • Thehistoricfoodie's Blog
    • Customize
    • Follow Following
    • Sign up
    • Log in
    • Report this content
    • View site in Reader
    • Manage subscriptions
    • Collapse this bar
 

Loading Comments...
 

You must be logged in to post a comment.