• About US & Thistle Dew Books
  • Book Shoppe
  • COPYRIGHT NOTICE
  • Emporium
  • Farm Photos
  • Historic Interpretation
  • List of Articles on TheHistoricFoodie’s Blog
  • Motorcycles are Everywhere, Please Drive Safely©
  • PROGRAMS, DEMONSTRATIONS & LECTURES: Martin and Vickie Can Provide

Thehistoricfoodie's Blog

~ An enjoyable ramble through the world of Historic Foods and Cooking to include Gardening History, Poultry History, Dress, and All Manner of Material Culture.[©]

Thehistoricfoodie's Blog

Monthly Archives: April 2013

Tea Bowls and Saucers©

30 Tuesday Apr 2013

Posted by thehistoricfoodie in 18th century food, early household items

≈ 3 Comments

Tags

18th century cups and saucers, tea bowl

sgraffito-ware jug and cups, Jamestown Ntl Hist siteMeissen, deep saucer 18 cJean-Etienne Liotard 1702-1789, ca 1781-83Georgian tea bowlEnglish tea bowls 1760-18301740-50 France1759-69 V&A Museum

The photos above show tea bowls and saucers from the first half to early 3rd quarter of the 18th century as found on various museum collections online, primarily the Metropolitan and the Victoria & Albert. Notice the shape and depth of the saucers. The first photo is a vintage photo of cups from Jamestown. The boxed tea set is French in origin.

Samuel Pepys wrote in his diary in 1660 that he’d had a cup of tea for the first time and he was among the first Londoners to have the pleasure. By June 28, 1667, it was common enough he wrote he’d returned home to find his wife making tea, “a drink which Mr. Pelling the Pottecary [apothecary] tells her is good for her colds and defluxions”.

Some of the first teapots and drinking vessels for tea came as give-aways when one purchased tea because it was a new and novel concept and few people outside China had any notion of how to prepare or serve it.

Tea cups are found from the 18th century with and without handles. Researchers agree that the earliest tea cups had no handles and were referred to as tea bowls while early coffee and chocolate cups did have handles from their earliest form. The tea bowl grew larger as tea became more widespread and by 1800 most were being made with handles although some handle-less versions were still made into the mid-1800’s. Cups weren’t produced in huge quantities until about the middle of the 18th century.

The shape of cups, whether for chocolate, tea, or coffee, was much the same other than the presence or absence of handles, and they were decorated in much the same way. Motifs were often florals, outdoor scenes, and some variation of an oriental scene ranging from simple to quite detailed. Color could be basic blue and white or more elaborate with multiple colors on the piece.

Collectors prize pieces made in the factory at Meissen, near Dresden. The facility was founded about 1710 and is still in business today. It was the first to make hard-paste porcelain products outside of China. Pieces can be dated by using the maker’s mark.

True 18th century saucers, especially from the first half of the century, are usually very deep compared to today’s rather flat saucers giving rise to the belief that the tea was poured from the cup into the saucer and drunk from the saucer.

Cups and saucers could be purchased by the “set” which consisted of, “half a dozen cups and saucers, a small tea-pot, a slop-bason, a sugar-dish, and tea-canister”, which in Europe [Franconia, “called by the Germans Frankenland”], 1765, cost twenty dollars.

Eighteenth century estate inventories often list cups and saucers but rarely describe them, and when one finds a published inventory from the first half of the 18th century, the deceased was wealthy enough to garner attention, therefore, was not representative of the common person.

For example, Thomas Warren [1732] listed, “11 cups and 12 saucers, 3 tea pots, one slop bason, sugar dish and cover…some odd cracked coffee cups…a parcel of tin tea canisters…”.

A similar inventory for Richard Wooley [1732] enumerated, “8 China Cups, 7 China Saucers, a China Tea-pot, 2 white stone Tea-pots…[in another room] a Tea-Table with 12 Cups, 12 Saucers, 6 Chocolate Cups, a Tea-pot, Slop Bason, 2 large Saucers…”. The word China was italicized as shown in the original source.

Sir Joseph Eyles’ estate [1740] was listed the following: six fine tea-cups and saucers, teapot, milk-pot, sugar dish and basin with the brown edge; a red tea-pot, a sugar dish, bason, milk-pot, 8 cups and saucers; a “curious colour’d tea pot, sugar dish, and 6 cups and saucers; a blue and white tea pot, bason, sugar dish, plate, 6 cups and saucers, a fine old tea pot”; six old chocolate cups; a tea-pot, bason, sugar dish, milk pot, plate, tea canister, 6 cups and saucers, and 6 coffee cups.

In Europe and the Colonies, only the wealthier late 17th and early 18th century residents would have had high quality tea sets, and perhaps not even all wealthy colonists had separate cups for chocolate, coffee, and tea or a matching tea set. In inland areas where European goods weren’t always available, colonists may well have used redware cups and mugs for whatever beverages were at hand.

Pittsburgh Press, Oct. 1973. Metropolitan Museum of Art. Victoria & Albert Museum. Warren, Thomas. A True and Exact Particular and Inventory of All and Singular the Estate Effects Whatsoever of Thomas Warren. 1732. London. Fenning, D. A General Description of the World. 1765. London. ©theHistoricFoodie

Advertisement

Thinning the Beets

25 Thursday Apr 2013

Posted by thehistoricfoodie in 17th century food, 18th century food, 19th century food, canning and preserving, historic food

≈ Leave a comment

Tags

beet greens, pickled beets

beet

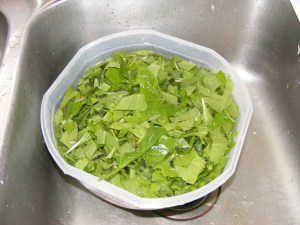
It was time to thin the beets so they will produce nice roots for pickling, so frugal me washed the ones I pulled up, gave them a ride in the salad spinner, and tomorrow I’ll be having the tastiest and freshest, not to mention prettiest, salad in town. The red streaks add so much color to the baby beet greens. If you haven’t had beet greens you’ll find them to be vastly under-utilized. As the photo shows, small tender ones are a salad-lover’s dream and larger leaves can be cooked by themselves or mixed with any other green. They cook up nice and tender with outstanding flavor.

This is just one of hundreds of plants and dishes researched for my upcoming book. Believe me, its been some delicious research! There is still time to plant vegetables and having no space is no excuse. If I can garden in raised beds and pots in my tiny yard anyone can be successful at it. As always, Blissful Meals! – the Historic Foodie

Update: My salad was so fresh and clean, vaguely earthy, and so tasty I ate every sprig. If I hadn’t already done it last night, I’d be planting more this afternoon. How can you lose? A cup of beet greens has only 39 calories and NO fat yet they supply 220% of our daily allowance of Vitamin A and 60% of vitamin C. The two containers I planted last night are just for the baby greens. I won’t worry about thinning them because I’ll be harvesting the leaves and won’t be concerned with the roots having enough space to grow. Today I truly enjoyed a Blissful Meal!

Ladies at Tea, Ft. Toulouse

25 Thursday Apr 2013

Posted by thehistoricfoodie in 18th century food, Colonial foods, Gingerbread, open hearth cooking

≈ Leave a comment

Tags

18th century ladies, edible flowers, violet jelly

936966_4902189032252_274068369_n

427823_4902156311434_1824819414_n

525351_4902151911324_881290267_n

417785_4902141671068_821956371_n

163959_4902164151630_1076912164_n

59681_4902144431137_1335552840_n

47982_4902203992626_1552002439_n

532044_4902208192731_1966228729_n

11872_4902171511814_54525750_n

541403_4902161431562_1397899697_n

934730_4902147631217_1056520724_n

I enjoyed co-hosting and visiting with everyone at the tea during the Ft. Toulouse F&I event (1760’s). The highlight of the day was watching William start to crawl so he could reach a piece of gingerbread. Soon he’ll be coming and going under his own power and mom and dad will be trying to keep up!

Deb’s tea selections included jasmine, Earl Grey, English Breakfast, and a peach flavored tea which was especially nice. It may run a close second to Earl Grey as my favorite.

Food included Irish bread with violet jelly, gingerbread with orange curd, finger sandwiches with fresh herbs, and apple nut small cakes. The platters were all decorated in keeping with the theme of edible flowers and the violet jelly served with the Irish bread was an example of what can be made from flowers.

The gentlemen joined us for a bit of a repast and fellowship after the ladies finished their tea and the day was quite lovely. Until next time, I bid you Peace & Blissful Meals. – the Historic Foodie

Eat Your Way to a Manicured Lawn

22 Monday Apr 2013

Posted by thehistoricfoodie in 17th century food, 18th century cooking, 18th century food, 19th century food, Colonial foods, historic food

≈ Leave a comment

Tags

foraging, greens, plantain

plantain 005plantain 004

plantain 002plantain 001

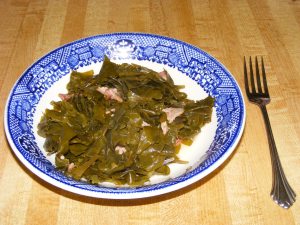
Today’s dinner will be BBQ ribs and plantain cooked with bacon, salt & pepper, a dollop of honey for sweetness and a tablespoon or two of home-made apple cider vinegar for tang. If you aren’t familiar with plantain, chances are you either have it in your yard or you’ve paid a lawn service to eradicate it.

Plantain is the broad-leaf weed that puts up in spring and together with another edible, dandelion, is the scourge of those who want a manicured lawn. Never fear though – if your gardener can’t get rid of it just put the young tender leaves in a pot.

Plantain is not native to N. America – you can thank your ancestors for bringing it over as a salad ingredient and potherb. It was cultivated in gardens but quickly escaped its confines and ran rampant over the land leaving traces as it dashed through one village after another.

The texture of it is much like collards and the flavor is even somewhat like collards. As long as the leaves are tender you probably wouldn’t notice much difference. The smallest of leaves can pop into a salad bypassing the cook pot. Although its edible at any stage, the older the leaves get the tougher and less desirable they get. The Mister doesn’t like greens period – wild or tame, but that’s OK, more for me. Blissful Meals, yall.

Edible Flowers

22 Monday Apr 2013

Posted by thehistoricfoodie in 17th century food, 18th century cooking, 19th century food, canning and preserving, Colonial foods, historic food, period food

≈ 3 Comments

Tags

edible flowers, violet jelly

April 2013 056April 2013 052April 2013 051April 2013 050

I’ve been researching plants for a new book and I’m also trying to remember some of what I wasn’t particularly interested in growing up relating to the use of wild plants. The theme for the tea at Ft. Toulouse’s French and Indian event this year was edible flowers. The food was garnished with a variety of edible flowers from my garden and the featured item on the table was violet jelly made from the petals of wild violets.

Picking the violets is time consuming and tedius, but the actual making of the jelly is pretty simple. It took Deb, Laura, Annabelle and me picking to get enough violets, but it turned out really pretty and is pretty tasty as well.

To make the jelly you need 2 heaping cups of wild violet petals, 2 cups of boiling water, 4 cups of sugar, a half cup of fresh lemon juice, 1 pkg. of liquid pectin.

Place the petals in a heat-proof container and pour the boiling water over them. Cover, and let steep at least 2 hours or overnight if you wish. If keeping overnight place in refrigerator after a couple of hours. Strain out all the petals which will have given up all their color. Don’t be alarmed at the dark blue color of the infusion. It will lighten up later.

Combine the infusion, lemon juice, and sugar and place over med heat. Bring it to a rolling boil, and stir in the packet of liquid pectin (Certo). Return to a hard boil and boil 2 minutes. While hot place into clean jars. As the jars are filled place, wipe clean at the top, and place a flat canning lid on the jar and screw down the ring. (The flats should be in very hot, but not boiling water prior to placement on the jars). Refer to standard canning instructions.

Now, allow the jars to sit, undisturbed until they seal. As they seal you will hear a pinging sound as the flats become depressed. Wipe the jars clean, and store in a cool dry place. This recipe will make about 5 half pints.

Photos: The violet jelly in the jars; a bit left over put into a saucer, the jelly in the pan while it was coming to a boil, and Miss Annabelle helping pick the violets. Blissful meals, enjoy the fruits of your labor.

TRUE AMERICAN TEA©

17 Wednesday Apr 2013

Posted by thehistoricfoodie in historic food, period food, Southern food

≈ 3 Comments

Tags

American Classic Tea

CHA-4173

Outsourcing jobs is one of the main reasons many Americans have lost faith in their government and why thousands of people who want, and are qualified for, employment can find only part-time employment with no benefits. With the loss of tax cuts and lack of raises many who are employed full-time are actually making less than they were a few years ago. I applaud efforts being made to provide jobs for Americans and boost the American economy so I’d like to share an American product.

A friend gave me a box of American Classic Tea’s Charleston Breakfast tea and I did some research on the company and the process whereby the tea is grown, harvested, and sold. Frankly, I’m pretty impressed.

The plantation is currently owned by the R. C. Bigelow Co. of Fairfield, CT, founded by Ruth Bigelow in the late 40’s, and employs some 350 people in blending tea. Bigelow sells many varieties, but the American Classic Tea is the only American-grown tea.

lg_63560

The Camellia sinensis plant is said to have been introduced to the U.S. by the French botanist, Francois Andre Michaux in 1799 when he presented plants to Henry Middleton of Charleston. The tea was planted in the garden at Middleton’s plantation where growing conditions seem to be just what the doctor ordered.

There are currently 127 acres of tea plants which are processed on-site producing six flavors: American Classic, Charleston Breakfast, Governor Grey, Plantation Peach, Rockville Raspberry, and Island Green Tea. American Classic Tea has been the “official” tea of the White House since 1987. The first families and their guests can support American-grown tea, but they can’t seem to extend that appreciation for, “Made in America”, much beyond that.

Still, it’s pretty impressive to know something like tea is growing on American soil and that it has found its way into stores in 17 different states. Perhaps, like Carolina Gold rice, it will find a ready market among foodies who appreciate high quality products and support the concept of American jobs for Americans.

Blissful Meals, yall, try the American Classic Tea and if you’re in the area, take a tour of the site and learn about how the tea is grown and processed.

PICKLED BEETS AND EGGS: A Bit of Pennsylvania in Alabama©

09 Tuesday Apr 2013

Posted by thehistoricfoodie in 17th century food, 18th century cooking, 19th century food, canning and preserving, Colonial foods, historic food

≈ 1 Comment

Tags

beets and eggs, Pennsylvania Dutch food, pickled beets

800px-Beets-Bundle

I’ve recently done some genealogy for Martin and discovered some very interesting people and learned a great deal about their German roots and the places they settled after immigrating to Pennsylvania in the early 1700’s. Places we’ve visited or passed through took on a new significance as I was able to connect actual people to the establishment of various towns and churches.

The Bradys count among their maternal ancestors Patriots from the American Revolution and soldiers from the American Civil War and that patriotic duty continues through Martin and his brothers who served in the USMC.

His mom is an amazing lady with a big heart and a keen sense of humor. I enjoyed learning about her family and their contribution to Pennsylvania history. I couldn’t be the historic foodie without an inherent curiosity about the foods of various cultures so after documenting births, deaths, marriages, baptisms, military service, census and immigration records, my attention turned toward the foods the families ate.

This post on pickled beets and eggs is a tribute to Martin’s Pennsylvania Dutch heritage and reflects the culinary traditions of his Zartman, Swartzbaugh, Weisensale, Teal, March, and Shanabrook ancestors. Pickled beets and eggs just happen to be one of our favorite things to have on hand both for eating and for adding to salads. Combining the pickled beets and boiled eggs is an excellent opportunity to use those wire-bail and vintage blue jars and other containers which look so pretty on the table as they can be made with pre-pickled beets and don’t go through a heat process.

I have a nice stand of beets in the raised garden beds Martin made for me, and if all goes well, I expect to have beet greens in a few weeks and also add several quarts of ruby red pickled beets to my pantry about June. As we open them we’ll add a dozen boiled eggs and let them marinate for a few days in the refrigerator and enjoy a refreshing cool snack when the blistering heat of the Deep South summer kicks in. I think his ancestors would approve of our thriftiness and self-reliance.

Pickled eggs minus the beets are commonly found in the cookery books of England and I found mention of them in Ireland (The Brady half of Martin’s ancestry). John Timbs wrote in 1847 that seasons when eggs were plentiful was the time to lay in a supply of pickled eggs which were, “a relishing accompaniment to cold meat”. I suspect his Irish ancestors were well acquainted with the addition of the eggs once they had immigrated to Pennsylvania. – Manual of Domestic Economy. 1847. London.

Lettice Bryan and others used mashed beet root to naturally color pickled eggs even when the beets weren’t intended to be served as a pickle. They do make a stunning presentation. – The Kentucky Housewife. 1839.

Pickled eggs were recommended for sea stores because, “they will keep any length of time”. Indeed, though most modern recipes say the eggs will keep a few weeks in the refrigerator, I have kept them for extended periods without refrigeration and they did just fine. [The reader will kindly assume any responsibility for doing so.] – Domestic Economy and Cookery. 1827. London.

Hannah Peterson’s receipt is a good one to look at first. Note her book was published in Pennsylvania where beets and eggs are served at home and on restaurant tables.

“Boil your beets till tender, but not quite soft. To four large beets, boil three eggs hard, remove the shells; when the beets are done, take off the skin by laying them for a few minutes in cold water and then stripping it off; slice them a quarter of an inch thick, put the eggs at the bottom, and then put in the beets with a little salt. Pour on cold vinegar enough to cover them. The eggs imbibe the color of the beets, and look beautiful on the table”. – The Young Wife’s Cook Book. 1870. Philadelphia.

Authors suggested dropping hard boiled eggs, “in pickled blood beet juice until the whites become colored. Cut lengthwise and serve as a relish”. – The Philalethean Cook Book. 1921. Montrose, CO.

Richard Bradley (1732), John Nott (1723), Elizabeth Cleland (1755), Hannah Glasse and several other 18th century writers advised using slices of pickled beets as garnishes for various foods because the color is so festive and the flavor lends itself to the enjoyment of the dish.

Charles Carter’s receipt for pickled beets predates sealable glass canning jars. The beets were pickled in a stone jar with an animal bladder stretched over the top to exclude the air and keep out unwanted dust or insects. The beets would “keep” so long as they were submerged under the brine, usually accomplished by placing a plate or other weight on top.

“Set a pot of spring water on the fire, when it boils, put in your beets, and let them boil till they are tender; then peel them with a cloth, and lay them in a stone jar, take three quarts of vinegar, and two of spring water, so do till you think you have enough to cover your beets. Put your vinegar and water in a pan and salt to your taste. Stir it well together, till the salt is all melted, then pour them on the beets and cover it with a bladder. Do not boil the pickle”. – The London and Country Cook. 1749. London.

Robert Smith included unspecified spice in his receipt and, like some others, instructed pickling turnips with the beets. – Court Cookery. 1725. London.

Try some this summer, you may just like them. Blissful meals, Yall.

RECIPES FOR USING CANNED CHICKEN©

05 Friday Apr 2013

Posted by thehistoricfoodie in canning and preserving, historic food, Southern food

≈ 1 Comment

Tags

canned chicken, chicken pilau, self-reliance

15532234-chicken-bhuna--bicolour-pilau-rice

I realize I’ll never be fully self-sufficient with my small yard but I’m determined to produce what I can with container gardening and whatever I grow I know how to preserve. With a properly prepared garden and knowledge of how to get the most per square foot, as much food can be grown in a small space as in a bigger sprawled out garden. My dad was very good at small plot gardening and from him I learned the importance of treating the soil and giving the plants all the nourishment they needed to grow and produce. When Martin made my raised beds he filled them with good compost from a local nursery to keep the soil loose and to be as rich as possible.

I’ve always put up food when I could to eliminate the nasty preservatives and additives in “store-boughten” foods and an extra plus is being able to make a meal without putting a great deal of thought and planning into it.

Wise cooks did likewise in earlier times and there is no better example than my late aunt Dora. She could go in the kitchen when it looked like there was nothing to work with and turn out a meal fit for a king. Women of that generation did not rely on pre-chopped and pre-cooked foods to feed their families. I’d like to share a few recipes for the type things that can be made from basic pantry staples.

FRICASEED CHICKEN
1 pint chicken stock or 1 cupful stock and 1 cupful thin cream; ¼ cupful flour; 1 pint canned chicken; Salt and pepper; Onion juice, celery salt, or celery leaves.
Reserve one-fourth cupful of stock. Add the seasoning to the remaining stock, and heat it to the boiling point. Blend the one-fourth cupful of stock smoothly with the flour, and with this thicken the hot stock. Boil the stock vigorously for five minutes. In this gravy warm the canned chicken. Do not boil the meat in the stock, for boiling toughens it. If desired, the chicken meat may be browned in butter before being added to the gravy. Serve the chicken on slices of toast, with baking powder or soda biscuits, or with boiled rice.

CREAMED CHICKEN
1 pint chicken, cut in dice; 2 cupfuls white sauce; 1/8 teaspoonful celery salt.
Warm the chicken in the sauce to which the celery salt has been added. Variations: The creamed chicken may be served with a border of hot boiled rice and canned sweet peppers or a border of mashed potatoes brushed with milk and browned in the oven, or one-fourth cupful of mushrooms cut in slices may be added.

WHITE SAUCE FOR CREAMED CHICKEN
1 cupful chicken stock; 1 cupful cream or milk; 1/3 cupful flour; ½ teaspoonful salt, few grains pepper
¼ cupful butter. Put the butter in a saucepan, and stir it until it is melted and bubbling. Add the flour, mixed with the seasoning, and stir the mixture until it is thoroughly blended. Add the stock and the milk, continue to stir the mixture, and bring it to the boiling point. Boil it for two minutes.

CHICKEN AND OYSTERS A LA METROPOLE. (You can use canned oysters).
1 pint white sauce, made with 2 cupfuls cream and ¼ cupful butter; 1 pint chicken, drained and diced; 1 pint oysters, cleaned and drained; 1/3 cupful finely chopped celery.
Add the chicken and the oysters to the sauce. Cook the mixture until the oysters are plump, and sprinkle it with celery before serving it.

CANNED CHICKEN WITH CREOLE SAUCE.
1 pint canned chicken; 6 tomatoes or 1 pint canned tomatoes; 3 sweet red peppers, fresh or canned, chopped; 3 sweet green peppers, chopped; ¼ pound ham or 2 or 3 slices bacon, chopped fine; 4 tablespoonfuls flour; ½ bay leaf; 1 teaspoonful chopped parsley; ½ teaspoonful salt; 1 small onion, chopped fine; 2 tablespoonfuls butter or bacon drippings.
Warm the contents of the can of chicken. Pour off the liquor, and dry the chicken meat. If desired, brown the meat delicately in a little butter or bacon fat. Cook the onion in butter or bacon drippings until it is light yellow, sprinkle into it four tablespoonfuls of flour, and brown the flour delicately. Pour into this mixture the tomatoes, which have been simmered with the bay leaf and salt for fifteen minutes. Allow the mixture to thicken, and strain it. Add the minced ham and parsley, and simmer the mixture for fifteen minutes. Add the chopped peppers and the chicken liquor, and bring the mixture to the boiling point. Simmer, do not boil, the browned chicken in this sauce for ten or fifteen minutes. Serve the chicken in a border of hot boiled rice on a hot platter.

Don’t forget chicken salad, chicken pot pie, chicken soup or stew, rice pilau, etc.

The article instructed canning chicken at home by deboning the meat and placing chunks of raw chicken into a jar with a half teaspoon of salt per jar. No water was added although the cook could add celery, onion, pepper, or other seasonings if desired. In the absence of a pressure canner, the chicken was processed for between 4 and 5 hours. The second method was to cook the chicken, pick off the meat and pack it into a jar, add the salt, fill the jar with the chicken stock, and process for three hours. [See my previous post] I’m thankful for my pressure canner because any time I have that much free time and money for gas I’d rather be on the motorcycle headed into the wind. With the pressure canner I can cut that 4 or 5 hours processing time down to 60 to 75 minutes and knock it out on a work night. Source: New York Dept. of Agriculture. Report. Vol. 1, Pt 2. Dec. 1, 1915.

Blissful Meals, yall.

BUTTER: Preservation Then and Now©

03 Wednesday Apr 2013

Posted by thehistoricfoodie in canning and preserving

≈ Leave a comment

Tags

canned butter

butter

For many years I lamented the fact that Americans were quickly losing any ability to provide for themselves, and the majority has, but there is a small but growing movement afoot to return to the ways of our past in order to provide for our families under the worst circumstances. For people such as myself who have always preserved food this is nothing new as the series of posts I’m working on will show.

One important ingredient in cooking is butter or other fat. If shortages become the order of the day as they did during the American Civil War and the two World Wars, having a supply of basics as well as what some would consider perishables will mean the difference between being slightly inconvenienced and doing without.

Salt helps to preserve butter and it will keep for extended periods without refrigeration. I keep it in the butter dish on the counter year round so when I want toast it’s not a hard little square impossible to spread. There are people who have “discovered” the ability to can butter for long term storage, but doing this is not a new concept. It was firmly documented by the late Victorian era and certainly healthier than some of the preservation methods used at that time.

Canning Butter. Rather than applying special antiseptics, as salicylic and boracic acid, etc., for preservation of butter, it may be preserved by being hermetically sealed—a method which has long been practiced, especially in case of butter intended for exportation to the tropics. Only butter of the very best quality can be used for this purpose, as only such will pay for the additional expense incurred by this method, and only such butter can stand the influence of the long transportation. Both sour-and sweet-cream butter are used for canning.

How often was this advice followed? More than four million pounds of canned butter was exported from Denmark alone during the year 1892-93. That’s a lot of butter my friend. – Grotenfelt, Gosta. The Principles of Modern Dairy Practice from a Bacteriological Point of View. 1902. NY.

Canning butter was done on a commercial and an individual basis. The U.S. Bureau of Animal Industry published requests for information useful to butter exporters in improving methods of canning butter for shipment to warmer climates in order to be competitive with other countries whose methods were quite successful. Such requests were published in 1892 and continued through 1900. – Science. Vol. 12. Dec. 14, 1900. Secretary of Agriculture. Annual Reports of the Department of Agriculture. July 1899.

Mrs. J. J. McGraw of Yazoo, MS was noted for her success in canning butter which could, “be kept fresh for any length of time…[and] is reported to have made a success of it. On all the sandwiches served at a recent luncheon there was spread a good layer of this two-year-old butter and it was pronounced excellent”. I’m sure the reader noted this was successful in the hot and humid climate of Mississippi. – Pennsylvania Bureau of Foods. Monthly Bulletin. Jan. 1915.

There are differing opinions on the safety of home canned butter and the reader assumes all responsibility in trying the various methods discussed here and on the internet.

Method #1:
Slowly melt the butter in a large pan until it comes to a simmer (slow boil). Stir the bottom of the pot often so it doesn’t scorch. Reduce the heat and continue to simmer for 5 to 10 minutes.

Put the flat lids in a small quantity of water in a pan which should be kept hot but not boiling.

Fill your hot jars while the butter is at a simmering temperature. Leave 1 inch of head space. Wipe the top of the jar and make sure there is no butter to interfere with the seal. Put on a flat and screw the ring down tightly. You’ll hear gentle “pings” as the jars seal and as they cool enough to handle give them a gentle shake now and then to keep the solids from all settling in the bottom of the jar. When warm to the touch but not hot put the jars into the refrigerator and shake every 5 minutes until cold. Store your butter in a cool dry location.

Method 2: My method of preference is to slowly melt the butter on the stove or in the microwave, put the hot butter into jars (I prefer half pints), and then either pressure can at 5 to 10 min. at 5 lbs. pressure, or use a water bath long enough to completely heat the jars through and through. Give the jars a gentle shake now and again as they cool and store the butter in a cool dry place. It wouldn’t hurt to add a little extra salt to help preserve the butter over long periods of time.

For anyone who trusts the safety of commercially canned products more than what they make themselves there are multiple sources for buying canned butter. Expect to pay more and incur a shipping charge.

For those who neither want to can their own or purchase expensive canned butter for cooking, there are healthy ways to bake successfully without fat, just use the quantity (or slightly more) of canned pumpkin or canned applesauce instead of butter, lard, shortening, or oil. Canned pumpkin and applesauce keep practically indefinitely until they’re opened and are a healthy satisfying alternative. If you have it (which you probably wouldn’t in drastic times), mayonnaise works well in place of fats in baked goods. I’ve made quick rolls for years using Self-rising flour, mayonnaise, and milk or buttermilk.

See: Rogers, Lore Alford. Studies Upon the Keeping Quality of Butter. 1904. Washington.

Getting the Most for your Food Dollar©

01 Monday Apr 2013

Posted by thehistoricfoodie in Southern food

≈ Leave a comment

Tags

food preservation, grocery ads, grocery sales

67937_292839080846297_1357117952_n

Are you so wealthy you don’t need to save a buck when you can? I didn’t think so. The biggest increase in prices in recent months has been groceries so let’s see what we can do to spend less and get more.

Grocery sales are the time to stock up on essentials and items your family uses a lot of, and your success depends on knowing when an item is at its rock-bottom price. That’s when you purchase enough of that item to last until it goes on sale again. If your store cooperates with you, use your coupons while an item is on sale and save even more. Fifty cents off BBQ sauce that’s on sale for a buck, is better than fifty cents off at two or three dollars per bottle.

Sale items are often timed to coincide with consumer demand, for example, if turkey is going on sale it’s generally going to be in November when Thanksgiving and Christmas are coming up. BBQ sauce may be at its lowest just before July 4th for summer cookouts and …..well, you get my drift.

Some items are not only on sale, but widely available at such a time when they might not be at others. Enormous quantities of dried peas and smoked hog jowl will be at their cheapest a week or so before Christmas, and once they’re gone they may be gone till the next December. Summer green beans, collards, kale, cabbage, etc. just aren’t the same without some diced and browned smoked jowl.

In January don’t forget National Oatmeal Month and put back enough for your morning porridge and a few batches of oatmeal raisin cookies.

February is national canned food month – all together now, class, what should we be stockpiling in February? Following national canned food month comes frozen food month. How about some frozen corn, beans, soup mix or chicken tenders?

Ham is usually the big sale item before Easter. This year’s deal was Smithfield hams for 99 cents per lb. at Winn Dixie. Ham and Navy bean soup can’t be beat.
I had hoped to see eggs on sale for dying, but that didn’t happen this year. If it had, there would be quarts of pickled eggs in my pantry.
Prior to Memorial Day meats for the grill, condiments like that BBQ sauce, and maybe chips should be cheap enough to entice you into the store, and the nice air conditioning will make you comfortable enough to stay long enough to buy lots of other non-sale items. Charcoal will probably be priced lower than usual to go with the cheaper ground beef and wieners.
June is National Dairy Month – not sure what you may do with 10 gallons of milk unless you’re a cheese-maker, but it’s a good time to stock up on butter and either can it or freeze it. Until it’s opened and exposed to the dry air in the freezer ice cream keeps pretty well, and well, it IS dairy. Yogurt, cream cheese, whipping cream and the like also deserve your attention.
National Ice Cream Month takes place in July so if you didn’t already do so, load that buggy up. You might want to restock hotdogs, ground beef, buns, etc.
If you have little ones underfoot send them off to school with snacks, lunchables, and pudding cups you scored big with at the cash register and don’t forget the frozen waffles. It might be a good time to buy liquid soap, Kleenex, hand sanitizer, etc.

October’s big deal is often candy or maybe baking items, or hit one of those pick-your-own pumpkin patches and process your own pumpkin for pies, muffins, breads, and other baked goods. Roast your pumpkin in the oven instead of watering it down in a pot and those pies will be spectacular.
In November, sweet potatoes will probably be at their lowest price of the year. You may want to can some for candied sweet potatoes, or sweet potato casserole. Sweet potato bread wouldn’t be amiss either. Try to stockpile broths, nuts, evaporated or sweetened condensed milk, coconut, cake mix, butter, etc. while the price is dropped down low enough to pull you into the store. Pop a couple of turkeys in the freezer and smoke them as you get a craving for BBQ.
December may see an extension of the turkey sale season or you may see those hams marked down again. Baking items will be spilling out into the center aisle of the grocery store and that’s the time to stock up on dried candied fruit if you have a need for it. Personally, after the cherries you can have most of the rest of it, except maybe pineapple.
You may as well check out prices on instant potatoes, gravy mixes, cranberry sauce, poultry seasoning, etc. for long term storage. If you’re going to drag out the mylar bags and oxygen absorbers for storing oatmeal in January, you may as well do instant potatoes along with the oatmeal. You won’t find chicken broth for less than it will be in December – sometimes 3 for a $1.00 at the dollar store and it doesn’t matter what kind of store your sale items come from so long as they’re something you’ll use.
Let’s repeat all together: If possible, use coupons when an item is on sale to maximize savings. Buy in bulk when possible to last until the next seasonal sale. Get the freezer defrosted before frozen foods are the big interest item, and if you have a canner get those jars washed up to use for the summer pick-your-own veggies and fruits. Now, take a deep breath and go shop like you mean business.

Archives

  • August 2022 (2)
  • July 2022 (1)
  • April 2022 (1)
  • February 2022 (1)
  • October 2020 (2)
  • August 2020 (2)
  • July 2020 (2)
  • March 2020 (1)
  • July 2019 (1)
  • March 2019 (1)
  • February 2019 (4)
  • January 2019 (1)
  • October 2018 (1)
  • September 2018 (1)
  • August 2018 (2)
  • July 2018 (1)
  • June 2018 (2)
  • May 2018 (3)
  • April 2018 (2)
  • March 2018 (7)
  • February 2018 (1)
  • December 2017 (3)
  • November 2017 (1)
  • September 2017 (2)
  • June 2017 (1)
  • May 2017 (1)
  • March 2017 (1)
  • February 2017 (4)
  • January 2017 (1)
  • December 2016 (2)
  • October 2016 (2)
  • August 2016 (5)
  • July 2016 (2)
  • June 2016 (3)
  • May 2016 (7)
  • February 2016 (1)
  • January 2016 (8)
  • September 2015 (2)
  • July 2015 (1)
  • February 2015 (3)
  • January 2015 (2)
  • December 2014 (1)
  • November 2014 (2)
  • October 2014 (3)
  • August 2014 (6)
  • July 2014 (8)
  • June 2014 (8)
  • May 2014 (11)
  • April 2014 (4)
  • March 2014 (5)
  • February 2014 (4)
  • January 2014 (4)
  • December 2013 (3)
  • November 2013 (2)
  • October 2013 (4)
  • September 2013 (8)
  • August 2013 (1)
  • July 2013 (10)
  • June 2013 (2)
  • May 2013 (3)
  • April 2013 (10)
  • March 2013 (4)
  • February 2013 (3)
  • January 2013 (13)
  • December 2012 (13)
  • November 2012 (4)
  • October 2012 (1)
  • August 2012 (3)
  • July 2012 (12)
  • June 2012 (5)
  • May 2012 (5)
  • April 2012 (4)
  • March 2012 (8)
  • February 2012 (1)
  • January 2012 (5)
  • December 2011 (10)
  • November 2011 (2)
  • October 2011 (3)
  • September 2011 (4)
  • August 2011 (7)
  • July 2011 (10)
  • June 2011 (6)
  • May 2011 (1)
  • March 2011 (1)
  • December 2010 (2)
  • November 2010 (2)
  • October 2010 (3)
  • December 2009 (1)
  • June 2009 (13)
  • May 2009 (10)
  • April 2009 (9)
  • March 2009 (1)

Enter your email address to subscribe to this blog and receive notifications of new posts by email.

Join 526 other subscribers

Create a free website or blog at WordPress.com.

Privacy & Cookies: This site uses cookies. By continuing to use this website, you agree to their use.
To find out more, including how to control cookies, see here: Cookie Policy
  • Follow Following
    • Thehistoricfoodie's Blog
    • Join 478 other followers
    • Already have a WordPress.com account? Log in now.
    • Thehistoricfoodie's Blog
    • Customize
    • Follow Following
    • Sign up
    • Log in
    • Report this content
    • View site in Reader
    • Manage subscriptions
    • Collapse this bar
 

Loading Comments...
 

You must be logged in to post a comment.