• About US & Thistle Dew Books
  • Book Shoppe
  • COPYRIGHT NOTICE
  • Emporium
  • Farm Photos
  • Historic Interpretation
  • List of Articles on TheHistoricFoodie’s Blog
  • Motorcycles are Everywhere, Please Drive Safely©

Thehistoricfoodie's Blog

~ An enjoyable ramble through the world of Historic Foods and Cooking to include Gardening History, Poultry History, Dress, and All Manner of Material Culture.[©]

Thehistoricfoodie's Blog

Category Archives: historic food

“Dutch” Case-knife Beans: A Taste of History©

01 Wednesday Jul 2020

Posted by thehistoricfoodie in 17th century food, 18th century clothing, 19th century food, Colonial foods, gardening, Heirloom seed, historic food, Uncategorized

≈ Leave a comment

Tags

case-knife beans

Palatine June bean

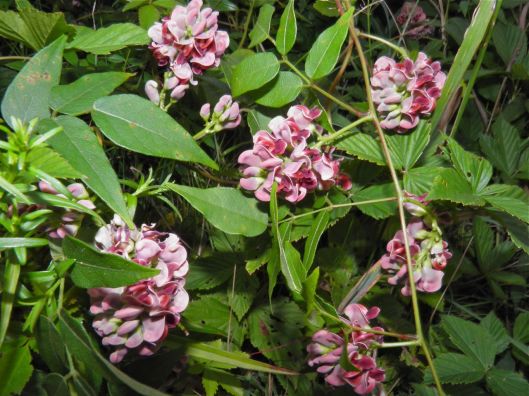
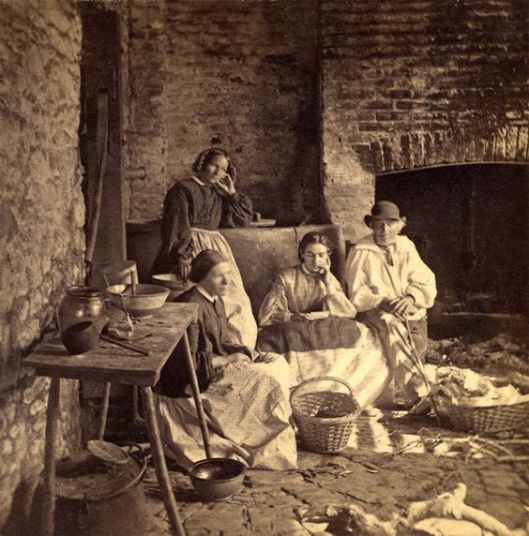
Photo:  William Woys Weaver, Roughwood Seed Collection

I once had someone who was viewed as an amateur historian tell me that people did not eat dried beans in the 18th century.  What?  I’ve never forgotten that and today we will debunk that theory.

The earliest description this writer found for a white-seeded bean that matches the description of what was later called the case-knife bean was written by Nicholas Culpepper in 1666.  “…but white is most usual; after which come long and slender flat cods, some crooked, some straight, with a string as it were running down the back thereof, wherein are contained flattish round fruit made to the fashion of a kidney…”.

Amelia Simmons was perhaps the earliest cookery book writer to document white beans for drying (1796) and Simmons listed a “clapboard” bean which some think was the case-knife.  She advised they must be poled and were, “the easiest cultivated and collected, are good for string beans, will shell”.

Philip Miller said in 1775 the Dutch White Beans were much the sweetest for the table.  He thought them “extream [sic] windy Meat” and recommended preparing them in the Dutch fashion of half boiling them then “you husk them and stew them… they are wholesome food”.

John Reid wrote of beans in 1683, “Beans and peas boyled with savory and thym[e]…served up with sweet butter beat amongst them and set a little on a coal or chaffing boyl [sic]”.  – “The Scots Gard’ner”.

A farmer wrote in 1840 that the “prettiest” way to grow dry beans was to raise white pole beans and, “The common case-knife beans are excellent for this purpose”.  Twenty-three years later Fearing Burr told his readers the case-knife was “common to almost every garden” and it remained so into the early 20th century.  Today the white-seeded variety of case-knife bean isn’t as common, at least by that name, but close versions can be found.

“Some Dutch case-knife beans did come up and grew finely…In good time they were heavily loaded, and they were of rich and splendid flavor, so much so I forbade wife cooking any more, having visions of acres of beans and a big bank account”.  One will pity this poor farmer when he explained that a mere few days before he went to pick his dried beans they had been beset upon by weevils.

“The manner of saving the seeds of these plants, is to let a few rows of them remain ungathered in the height of the season; for if you gather from the plants for some time, and afterwards leave the remaining for seed, their pods will not be near so long and handsome, nor will the seed be so good.  In autumn, when you find they are ripe, you should in a dry season pull up the plants and spread them abroad to dry; after which you may thresh out the seed and preserve it in a dry place for use”.  – Miller, Philip.  “The Gardener’s Dictionary”.  1768.

Buist [1805-1880] proclaimed the Dutch Case-knife to be an excellent pole bean producing a good crop of fine flavor and much earlier for the table than either the Lima or Carolina.  “It can be used either in or without the pod; it is also adapted for winter use”.

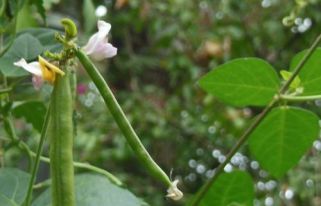
Mr. W. F.  Massey submitted information on white beans and their culture in the hot humid South for the Southern Planter and Farmer in 1900 saying they produced more damaged beans than when planted in the North.  He stated the best white beans he’d ever tried growing in the South were the Dutch Case-Knife beans.  “This is a pole bean, but not a rampant climber, and in my boyhood was commonly planted in the corn field and allowed to climb on the stalks in a portion of the field so as to give a supply for shelling in winter.  It is a flat bean, similar in shape to a small lima, but smaller still.  There is no shelled bean of better quality.”

As for the method of growing these beans they could be trellised or staked.  The following would make a nicer presentation than row staking.  “Strike out a dozen (or more) circles on the ground, as large as a cart wheel.  Put a wheel barrow load of manure into it and spade it up with the earth.  Drop the seeds in the circle, on the outer edge of the hill, say six inches apart.  Then insert eight or ten poles just within the circle, at equal distances from each other, and tie the tops of the whole together-forming a cone.  Cover up the seed and wait the result.

Each of these hills will yield you a peck or a half bushel of dry beans next fall—which if you have but a dozen such hills, will give you, perhaps half a dozen bushels.  This will be enough for your purpose.  By this course, but a little land is occupied.  Pole beans will yield very much more abundantly than bush beans, and occupy air, whilst the latter must have the surface of the earth”.  – Holmes, Frances.  “The Southern Farmer and Market Gardener”.  1842.

This bean was often referred to as Old Dutch White or White Dutch and differs from the brown-seeded variety sometimes sold as Caseknife today.  Old cookery books and garden manuals refer to white beans, small white beans, large white beans and great white beans.  All agree the white was preferred.

Dr. William Woys Weaver says the Caseknife Bean is perhaps the oldest documented bean in American gardens.  Like the farmers quoted above he believes the oldest were white seeded like those grown in the gardens of Thomas Jefferson and the closest variety to the original bean is the Pelzer Schwertebuhne (Palatine Caseknife Pole Bean).  He found the beans being grown by the Wendel family of Weilerbach in the Rheinland-Pfalz.  He offers the Palatine June Pole Bean in his Roughwood Seed Collection.

As to cooking dried white beans, let’s look at Louis Eustache Ude’s 1814 receipt.

White Beans a la Maitre d’Hotel.  “if they are dry, they must be soaked for an hour in cold water, before you boil them.  Then boil them in cold water and replenish with cold water also which makes the rind or coat tender.  White beans must be well done before you dress them, which is done as follows:  trim a stew-pan with a quarter of a pound of fresh butter, a little parsley chopped very fine, and some pepper and salt, over which lay the beans, well drained.  Keep moving the stew-pan without using a spoon, for fear of crumbling the beans.  Then squeeze the juice of half a lemon and send up quite hot”.

The Shop at Monticello offers seeds of the Caseknife Pole Bean which have white seed like the original and the flattened, slightly curving shape of the beans matches the description above.  They are grown out on-site.  A packet contains between 20 to 25 seeds and sells for $3.95 plus shipping.  1-800-243-1743.

Johnson’s Home and Garden offers “Old Dutch White Half Runner Bean” seed he says were brought from Germany by original settlers of the Dutch Fork Section of South Carolina.  A Half Pound of untreated seed is $3.95 and a pound is $5.95.  Johnson’s Home & Garden, 130 Power Drive, Pikeville, KY 41501, phone                   606-432-8460.

Roughwood Seed Collection:  https://www.roughwoodtable.org/roughwood-seed-collection offers the Palatine June bean seed.

GROUND NUT, aka hopniss, Indian potato, potato bean, openauk, vine potato.©

25 Monday Feb 2019

Posted by thehistoricfoodie in 18th century food, 19th century food, Colonial foods, gardening, historic food, homesteading, Uncategorized

≈ 4 Comments

Tags

apios Americana, groundnut

P8180876

Ground nut is a North American native and produces a tuber similar to a potato.  It is edible as are the beans, shoots, and flowers the plant produces.  In 1585 Thomas Harriot said of it, “Openauk, a kind of root of round form, some of the bigness of walnuts, some far greater, which are found in moist & marish [sic] grounds growing many together one by another in ropes, or as though they were fastened with a string. Being boiled or sodden they are very good meat…”.

groundnuts-closeup

One can hardly read a natural history, book of Indian lore, or an account of pioneers or mountain men without finding a reference to hopniss (the Lenape word for the plant) or Indian potato.  Accounts as early as 1626 call it Indian potato and by 1787 it was Apios Americana.  Lewis and Clark described it in their journals.  The name varied with tribe but each used it as food and as a medicinal.

ae02a446060d932c_0272-w500-h321-b0-p0--

Modern day permaculturists praise the plant, but it is nothing new to history.  The noted botanist, Peter Kalm, recorded the plant he called hopniss in his journal in March 1749, written from Raccoon Creek New Jersey.  “Hopniss or Hapniss was the Indian name of a wild plant which they ate at that time.  The Swedes call it by that name, and it grows in the meadows, in good soil.  The roots resemble potatoes, and are boiled by the Indians who eat them instead of bread.  Some of the Swedes, at that time, likewise ate this root for want of bread.  Some of the English still eat them instead of potatoes, but likewise take the peas that lie in the pods of this plant and prepare them like common peas.”

Further, Parkman in “Pioneers of France” stated that Charles de Biencourt and his followers at Port Royal [Acadia, New France, now Canada], in 1613, were scattered about the woods and shores digging ground-nuts.  Jacob Cornutus published a history of the plants of Canada in Paris in 1635 in which is found the ground-nut.   Jane Loudon included the plant in her “The Ladies’ Flower-garden of Ornamental Perennials” and in discussing the edibility of the tubers noted that the plant had been introduced in England before 1640 and was cultivated in Germany (1843) where the tubers were sold in markets.  Whittier spoke of “Where the ground-nut trails its vine” in his “The Bare-footed Boy”.

Henry David Thoreau wrote about these tubers in his journal.  October 12, 1852. I dug some ground nuts with my hands in the railroad sand bank, just at the bottom of the high embankment on the edge of the meadow. These were nearly as large as hen’s eggs. I had them roasted and boiled at supper time. The skins came off readily, like a potato’s. Roasted they had an agreeable taste, very much like a common potato, though they were somewhat fibrous in texture. With my eyes shut I should not have known but I was eating a somewhat soggy potato. Boiled they were unexpectedly quite dry, and though in this instance a little strong, had a more nutty flavor. With a little salt a hungry man could make a very palatable meal on them.

On March 17, 1849 an article on apios tuberosa was published in “The Gardener’s Chronicle” which discussed its introduction to Ireland during the potato famine.  “The apios has a curious underground vegetation; its roots are the size of a quill pen, cylindrical, running horizontally under the soil, but close to its surface, and are often two meters long, and sometimes much longer than that.  Here and there the roots swell insensibly; the swellings gradually become spindle-shaped, grow larger, become filled with starch, and form true tubers.  The swellings are sometimes close together, so as to form a sort of chaplet.”  The woodcut that accompanied the article was a fine likeness.

As to flavor the tubers were compared to a chestnut or potato with a bit of artichoke, “which is by no means unpleasant”.  It is almost certainly the Jerusalem artichoke being discussed as other 1840’s sources specify such.

A research team at Southern Louisiana State University invested twelve years in improving the size of the tubers and the number of tubers produced per plant under the direction of Professor Bill Blackmon.  Unfortunately the research was abandoned after Professor Blackmon left the university so we aren’t likely to see them perfected to the point that they are cost efficient to grow commercially.  The tubers going into our garden were ordered from Sow True Seed and were cultivated from that improved LSU stock.  At least two universities have done studies on the nutrition-packed tubers and found they contain significant isofavones, chemicals linked to a decreased incidence of prostate and breast cancers.

Plants are drought tolerant and perennial.  It is slow to establish itself and tubers should not be harvested its first year.  In fact some growers recommend waiting until the third year to harvest tubers.  Tubers grow on a stringy root and resemble beads on a necklace.  The tubers may be some distance from where the plant grows so it is best to start at the plant and follow the string wherever it goes.  Descriptions of growth habit vary from a vine that grows to six foot long to twenty feet.  It is a nitrogen fixing plant meaning it pulls nitrogen from the soil to the surface where it can nourish nearby plants.

The vine is thin, covered with fine hair and rather tough for its size.  Leaves are pinnately compound with three to nine two-inch leaflets (3, 5, 7, or 9) with no teeth.  The flowers are a lavender/brown color and fragrant.  Tubers vary in size from dime size up to grapefruit size, though the larger tubers usually average about the size of an egg.  Second or third year tubers are the largest.  Those can be harvested and the smaller ones replanted.  Tubers can be dug any time of year, but the tubers are sweetest in the fall.  Seeds grow in a pod and can be harvested before they dry enough that the pod shatters sending seed everywhere.

Seeds do not always germinate well, however, and the plants are usually started from tubers planting them individually or in strings.  Suckers can come up some distance away from the host plant.  Vines can be pruned to keep them from spreading too much.

“Most of the research involving cultural practices has been directed towards developing techniques to screen large numbers of plants. Direct-seeding has presented problems. Seeds may take 10 to 30 days to germinate. Seedlings are small and early seedling growth is not vigorous. Seedling death, presumably from insects or diseases, has plagued this technique for starting apios. The most satisfactory method has been to start plants in peat pellets. After germination, when the shoots begin elongation, the plants are pinched back to the first leaves. This prevents the plants in a flat from twining on each other, allows for better root development prior to planting, and permits plants from slower germinating seed to reach sufficient size to transplant. However, pinching back carries a potential risk of spreading disease among the seedlings. Weak seedlings can be discarded at this stage. 

Tubers are planted intact. The buds that give rise to the shoots and rhizomes occur at the distal end of the tubers. The potential of dividing tubers into sections prior to planting needs evaluation. Generally the larger the tuber, the more rapid the early growth.  Seeds may be harvested from the time the pods first begin to dry. If left on the vine too long some pods will shatter.  Tubers are harvested after frost. Since most of the plants are different (originating from seeds), the tubers are harvested with a shovel to insure that genotypes can be evaluated individually. Fortunately, tubers can remain in the soil for extended periods without rotting even under water-logged conditions, thus allowing an extended harvest period.

Although apios in its native habitat is found growing on water-logged and acidic soils (Reed and Blackmon 1985), observations under field conditions indicate that apios grows best on well-drained soils. A pH less than 5 or as high as 8 may also be detrimental to growth. Adequate moisture is important, but excess moisture encourages longer rhizomes.”  Perdue crop proceedings 1990. 

Eat them boiled, roasted, or slice and fry them after boiling.  Tubers can substitute for potatoes in any dish though the flavor has been described as nuttier than potato and they can be cooked peeled or unpeeled.  The tubers can be dried, ground, and used like flour to add to bread or to thicken soup or stew.  The flowers are edible raw or cooked and the seeds can be shelled and cooked.  The seedpods can be cooked like green beans if harvested before they become tough and fibrous.  The tubers have a much higher percentage of protein than potatoes.

I’ve planted these along with Jerusalem artichokes and I’m watching to see if they come up.  As long as the chickens or squirrels don’t dig up the tubers I should be fine in which case I should have tubers I can harvest in two to three years.  Blissful Meals, friends, and happy gardening.©

A DINNER OF HERBS©

01 Friday Feb 2019

Posted by thehistoricfoodie in 17th century food, 18th century food, 19th century food, gardening, historic food, homesteading, Self-sufficiency, Uncategorized

≈ 6 Comments

Tags

culinary herbs, herbs

Herbs-culinary-at-market

As spring approaches I prepare to perfect my herb garden planting as many perennial culinary herbs as I can fit into corners of my flower garden or containers placed in empty spots so my thoughts turned to the old fashioned kitchen gardens.  The following is one woman’s ideas on using her herbs to prepare an entire dinner.  In addition to those discussed in the quote, the author also discussed growing and using tansy, marjoram, basil, balm, rosemary, clary, lavender, dill, fennel, angelica, anise, caraway, coriander, chervil, cumin, horehound, lovage, marigold, samphire, borage, rue, and winter savory.

images

“To prepare a dinner of herbs in its best estate you should have a bed of seasonings such as our grandmothers had in their gardens, rows of sage, of spicy mint, sweet marjoram, summer savory, fragrant thyme, tarragon, chives, and parsley.  To these we may add, if we take herbs in the Scriptural sense, nasturtium, and that toothsome esculent, the onion, as well as lettuce.  If you wish a dinner of herbs and have not the fresh, the dried will serve, but parsley and mint you can get at most times in the markets, or in country gardens, where they often grow wild.

Do you know, my sister housewife, that if you were to have a barrel sawed in half, filled with good soil, some holes made in the side and then placed the prepared half barrel in the sun, you could have an herb garden of your own the year through, even if you live in a city flat?  In the holes at the sides you can plant parsley, and it will grow to cover the barrel, so that you have a bank of green to look upon.  On the top of the half barrel plant your mint, sage, thyme, and tarragon.  Thyme is so pleasing a plant in appearance and fragrance that you may acceptably give it a place among those you have in your window for ornament.

The Belgians make a parsley soup that might begin your dinner, or rather your luncheon.  For the soup, thicken flour and butter together as for drawn butter sauce, and when properly cooked thin to soup consistency with milk.  Flavor with onion juice, salt and pepper.  Just before serving add enough parsley cut in tiny bits to color the soup green.  Serve croutons with this.

For the next course choose an omelette with fine herbs. . .added to it minced thyme, tarragon and chives. . .

Instead of an omelette you may have eggs stuffed with fine herbs and served in cream sauce.  Cut hard-boiled eggs in half the long way and remove the yolks.  Mash and season these, adding the herbs, as finely minced as possible.  Shape again like yolks and return to the whites.  Cover with a hot cream sauce and serve before it cools.  Both of these dishes may be garnished with shredded parsley over the top.

With this serve a dish of potatoes scalloped with onion.  Prepare by placing in alternate layers the two vegetables; season well with salt, pepper, and butter, and then add milk even with the top layer.  This dish is quite hearty and makes a good supper dish of itself.

Of course you will not have a meal of this kind without salad.  For this try a mixture of nasturtium leaves and blossoms, tarragon, chives, mint, thyme and the small leaves of the lettuce, adding any other green leaves to the spicy kind which you find to taste good.  Then dress these with a simple oil and vinegar dressing, omitting sugar, mustard or any such flavoring, for there is spice enough in the leaves themselves.

Pass with these, if you will, sandwiches made with lettuce or nasturtium dressed with mayonnaise.  You may make quite a different thing of them by adding minced chives or tarragon, or thyme, to the mayonnaise. . .

Whether this ‘dinner of herbs’ appeals to the reader or not, I venture to say that no housewife who has ever stuffed a Thanksgiving turkey, a Christmas goose or ducks or chickens with home-grown home-prepared herbs, either fresh or dried, will ever after be willing to buy the paper packages or tin cans of semi-inodorous, prehistoric dust which masquerades equally well as ‘fresh’ sage, summer savory, thyme or something else. . .”.

Blissful meals and Joyful Gardening!©

Source:  Kains, Maurice Grenville.  “Culinary Herbs”.  New York.  1920.

CHEESE STRAWS: A Quick History©

30 Tuesday Oct 2018

Posted by thehistoricfoodie in 19th century food, historic food, homesteading, Self-sufficiency, Southern food, Uncategorized

≈ 3 Comments

Tags

Cheese straws

wemc3_fzec_003

One of my favorite finger foods is cheese straws.  I have little self-restraint when I have access to them.  Being the “historic” foodie, I’m honor bound to pass on a little knowledge today concerning this basic, but oh so divine, snack.  Join me as I stroll down memory lane.

Cookbooks often suggest serving cheese straws with salads or soup, others list them with appetizers, or occasionally served with raw celery.  In some instances they were served between the main course and dessert, perhaps with almonds or other nuts.  Occasionally one finds instructions for presentation such as, “When served, the cheese straws should be piled log fashion on a plate.”  Notice the 1930 recipe below in which the cook is told to cut some in rings and some in straw-shape.  To serve those the straws were inserted through the ring as noted in the photo.

3c437e60143e80dd5d9a8a41c35c1071

Cheese Crackers were the lazy housewife’s alternative to delicate cheese straws.  Butter, cayenne, salt, sometimes dry mustard, and cheese were spread on crackers, often thicker and harder than today’s saltine, and baked to a nice brown to melt the cheese.  Thick crackers were often split in half prior to spreading on the cheese mixture.

cheese_tasty

By the turn of the 20th century commercial products were available including Huntley & Palmer’s Cheese Straws Biscuits, Sunshine Cheese Sticks, Sunshine Cheese Wafers, and National Biscuit Company’s Al Fresco Cheese Wafers.  The price and quality varied widely with the quality and amount of cheese used.  A commercially product as good as the real thing baked at home was, and is, as hard to find as the proverbial needle in a haystack.

To study recipes for cheese straws is first realize the same product may go by different names.  For example, in 1828, Louis Eustache Ude’s recipe for Ramequins a la Sefton, is cheese straws made from puff paste.  “After you have made the pastry for the first and second course, take the remains of the puff-paste, handle it lightly, spread it out on the dresser, and sprinkle over it some rasped Parmesan cheese; then fold the paste in three, spread it again, and sprinkle more cheese over it:  give what we call two turns and a half, and sprinkle it each time with the cheese:  cut about eighteen ramequins with a plain round cutter, and put them into the oven when you send up the second course;  dish them the same as the petits pates, and serve very hot on a napkin”.

1837, repeated in 1847.  “The Cook and Housewife’s Manual”.   In a menu in this book we find Cheese Biscuits, however, there is no recipe given.  “. . . a silver bread-basket in the centre [of the table], in which rusks or cheese biscuits are served on damask or fancy-netted napkin. . .”

In 1864, “Cre-fydd’s Family Fare”, published in London, contained a typical recipe for cheese straws, exact in ingredients and method, but called them Cheese Biscuits.  There is no way to know for sure, but there is a good likelihood that the 1837 and 1847 versions were the same.

  1. “Godey’s Magazine”. October, 1865.  This issue of the popular magazine contained three recipes for Cheese Straws.  The first was, “half a pound of puff paste, three ounces Parmesan cheese, grated, a little Cayenne, salt, and pepper, roll it very thin, cut it in narrow strips, bake them in a moderate oven, and send it up very hot.

#2, “Take a quarter of a pound of flour, and two ounces of butter broken into the flour with the fingers, and rubbed in till quite smooth, two ounces of good cheese grated on a bread-grater, the yolks of two eggs, and the white of one; season to taste with Cayenne pepper and a small pinch of salt.  Mix all together, roll it out to the thickness of rather less than a quarter of an inch (say one-eighth), place it on a well buttered tin, and cut it with a paste-cutter into strips about the width of those used to put across an open tart, and four or five inches in length.  They must be removed from the tin with care, so as not to break them, after having been baked in a moderate oven for about five or six minutes.  Biscuits can be made of a mixture prepared in the same way by using biscuit tins for cutting instead of a paste cutter.”

  1. “Dainty Dishes, Receipts.” Pailles au Parmesan, or Cheese Straws.  Take six ounces of flour, four of butter, two of cream, three of grated Parmesan cheese, the slightest grating of nutmeg, two grains of cayenne, a little salt and white pepper;  mix the whole well together, roll it out, and cut it in strips the size and thickness of a straw.  They must be baked in a moderate oven, should be quite crisp, and of a pale colour.  Serve very hot in the second course.
  2. “The Official Handbook for the National Training School for Cookery.” The basic method for most of these recipes is the same and modern recipes are easily found so we will not trouble the reader with inserting it into every entry.  Ingredients for this version were 2 oz. butter, 2 oz. of flour, 2 oz. grated Parmesan, 1 oz. of grated Cheddar, 1 egg, salt and cayenne pepper.
  3. “Everyday Housekeeping”. Their version contained a quarter cup of bread crumbs with the flour, butter, and cheese and white pepper in addition to the cayenne.
  4. “One Thousand Salads”. This dandy gem of a cookery book contains 27 recipes for Cheese Straws, made in varying ways from strips of puff paste sprinkled with grated cheese and seasonings to mixtures like the 1877 version – flour, grated cheese (Cheddar and/or Parmesan), butter, egg yolk, salt and cayenne.  A few also suggest grated nutmeg or paprika.
  5. “Better Meals for Less Money”. One of the recipes in this book recommends the addition of 1/8 teaspoon [dry] mustard, reminiscent of versions of Welsh Rarebit.
  6. “Old Southern Receipts”. 2 ounces of flour, 3 ounces of parmesan cheese, yolk of one egg, a little pepper, cayenne, a little salt.  Mix the flour, cayenne, salt and cheese together.  Moisten with the egg and work into a smooth paste.  Roll out on a board one-eighth inch thick, five inches wide, five inches long.  Cut some of the paste in small rings—some in small strips one-eighth inch wide.  Place both on greased paper and bake ten minutes, or to a light brown.  Put the straws in bundles in the rings.  [Rings and straws were documented in some of the earlier recipes.]
  7. By WWII era recipes for Cheese Straws were virtually unchanged.

I leave you, as always, with a fond wish for Blissful Meals and an invitation to visit often.  – Victoria Brady, The Historic Foodie.©  All Rights Reserved.

CELERY: More than Mirapoix©

27 Monday Aug 2018

Posted by thehistoricfoodie in 19th century food, early household items, gardening, historic food, Table manners and etiquette, Uncategorized

≈ 5 Comments

Tags

celery dish, celery glass, celery vase

Not all modern gardeners have grown celery so one might doubt its popularity in times past, but I have yet to see a gardening treatise or catalog that doesn’t discuss growing celery.  Cookery books encouraged the liberal use of it as a seasoning and as a salad which might have been as simple as crisp celery in a celery vase.

0eddbc1c3f31382a7f65ca35f4e8d887--vintage-vases-pressed-glass

The Victorian celery vase or glass was an essential part of a well-dressed table from the 1820’s into the 1910’s although some journals advised readers the celery vase was being phased out in favor of a boat-like dish in the 1890’s.  The vases grew in popularity until mass-production flooded the market.

il_340x270.1564008042_mq5v

“Celery is sometimes chopped small and mixed with a dressing made as directed for lettuce; but the usual way of preparing them is to scrape and wash them clean, and let them lie in cold water till just before they are to be sent to the table; then wipe them dry, split the ends of the stalks, leaving on a few of the green leaves, and send them to table in celery glasses.  Celery should be kept in a cellar, and the roots covered with tan to keep them from wilting.”  – The Kentucky Housewife.  1839.

j546_cel_pi_2000x

When celery was served at table, those who desired to do so, helped themselves to a stalk, dipped it in a little salt on one’s plate and ate it.  The celery was expected to be tender and crisp when served alone.  “To Crisp Celery.  Let it lie in ice water two hours before serving.  To fringe the stalk, stick several coarse needles into a cork and draw the stalk half way from the top several times, and lay in the refrigerator to curl and crisp”.  – Vaughn’s Seed Store.  1898.

7bd5dd0b16ca2ab5b1eadd07777ea50e      PanelPalmRoseCeleryVA  406076852f28e61b835090032317ba40


7db6eb28bc039acaf49a97791e1f951f--cranberry-glass-celery   ec2b15feb1cd344a71a6583203d65938

421577430_fullsize

Celery was no exception to the “waste not,  want not” approach to food.  “There need never be any part of a bunch of celery wasted.  Serve the small, white stalks whole with salt, or cut fine and dressed as a salad.  Cut the larger stalks into short pieces, cook in boiling salted water and cover with cream sauce.  The very coarsest pieces may be boiled and strained for soup.  Nearly all soups may be improved by the addition of celery.  Dry the leaves in the oven, then chop or rub fine and they are nice for seasoning soups”.  1904.

Now, gentle reader, let us look at recipes for various prepared dishes of celery which might dress our table for that next special occasion meal.

Celery Salt.  1904.  This is very nice to season oysters, gravies, soups, etc.  Dry and grate the roots of celery and mix with one-third the quantity of salt.  Put into bottles and keep tightly corked.

Celery Fried.  1786.  When boiled, dip it in batter, fry it of a light brown, and dry; pour over melted butter.

Celery to fry.  1818.  Cut off the heads, and green tops of six or eight heads of celery; take off the outside stalks, pare the roots clean have ready half a pint of white wine, the yolks of three eggs beaten fine, salt and nutmeg; mix all together with flour into a batter, into which dip every head, and fry them in butter; when done, lay them in your dish, and pour melted butter over them.

Celery Sauce.  1818.  Boil celery heads three inches long, in a little stock, till nearly done and the liquor almost wasted away, then add some béchamel. . .

Celery Fritters.  1909.  Make a batter of two eggs, one cupful of milk, a tablespoonful of melted butter, one cupful of flour, and a pinch of salt.  Boil until tender in salted water stalks of celery cut into four inch lengths, drain, cool, and dry.  Dip in batter, fry in deep fat, drain, and serve with Hollandaise Sauce.

Creamed Celery.  1909.  Clean, trim, and cut the celery into short pieces.  Boil until tender in salted water, drain, and reheat in a Cream Sauce.  Sprinkle with grated nutmeg if desired.  Diced cooked carrots may be added to Creamed Celery.

Cabbage and Celery Cooked.  1909.  Cut cabbage fine, and soak in salt water, drain and add equal amount of chopped celery, cook until tender, drain and sift a little dry flour over the hot cabbage and celery, cook the flour, add milk, when done add one beaten egg; serve at once.

Escalloped Celery.  1909.  Chop celery very fine or cut in half-inch lengths and cook until tender in boiling salted water to cover.  Drain and reheat in a cream or White Sauce.  Put into a buttered baking-dish in layers, sprinkling each layer with grated cheese or crumbs or both crumbs and grated cheese.  Have crumbs and cheese on top, dot with butter, and brown in the oven.  Oysters also may be put between the layers.

Celery-Potato Croquettes.  To a pint of mashed potatoes add half a teacup of cooked celery, season with a tablespoon of butter, half a teaspoon of salt, a dash of white pepper; add the yolk of one egg.  Roll in shape of a small cylinder three inches long and one and a fourth inches thick.  Dip them in the beaten white of egg, roll in cracker or bread crumbs and fry.

Cream of Celery Soup.  1909.  One-third cup of celery cut in pieces, two cups of boiling water, one sliced onion, two teaspoons of butter, three tablespoons of flour, three cups of milk, salt and pepper to taste.  Cook celery till soft, rub through sieve, scald milk with onion in it, add to celery, bind and season.

Stuffed Celery.  1913.  Mix cream cheese with enough cream to moisten it; season with salt and cayenne; chop 8 olives and ½ lb. English walnuts and mix with cheese.  Select short wide pieces of celery, trim off most of the leaves and fill with cheese mixture.

MUSCOVIES, South American Water Fowl©

26 Thursday Jul 2018

Posted by thehistoricfoodie in historic food, homesteading, poultry history, Self-sufficiency, Uncategorized

≈ Leave a comment

Tags

Muscovy

183438-004-FFAA10E6

The case of the Muscovy water fowl of South America is not the first time I’ve looked at archaeology books for a look at poultry origins although they might seem an odd place to look.  Sometimes one of the best records comes from these sources.  Silverman and Isbell noted they were kept by natives in South and Central America prior to Columbus’ second voyage in 1494 and Roberts likewise documented them through Diego Alvarez Chanca in 1494.  [The latter was a Spanish physician and companion of Christopher Columbus.]  By 1555 they were documented in Europe and, “in the lesser Antilles, along the Caribbean shores of South America, and into Honduras and Mexico”.  They attribute the culture of the Muscovy to the Aztecs.

In 1891, H. S. Babcock wrote in “American Agriculturist” that Muscovies were rarely seen in New England and the Northern states, but were kept in larger percentages the farther South one traveled.  There he said the Pekins, Cayugas, and Rouens common in the North were much fewer in number while Southern farms with Muscovies were plentiful.

Ralph

Martin Brady with Ralph.  Ralph and his mate Alice are our first pair of Muscovies.

In 1810, “A Treatise on the Breeding, Rearing, and Fattening of Poultry” was translated from French to English where a passage notes that the Muscovy, “stocks the farm-yards of our colonies; it has long been brought into ours [in France], where it proves profitable. . . “.  France held an enormous amount of land during this time and the book did not specify whether the colonies in question were in America, Canada, or elsewhere.  The fact that the author did not specify; however, tends to infer the statement was aimed at the whole of the French colonies.

It is a distinct species from all known varieties of duck, therefore, not actually a duck at all.  As with the mule, any progeny of a Muscovy and a duck is sterile.  Early European breeders did sometimes encourage the mating of Muscovies and common ducks because the young matured quicker and made it to the table with less expense in feed.  Unlike ducks, the female Muscovy usually weighs in at about half the weight of the male and the tail feathers of the Muscovy drake do not have the signature curl of ducks.

Muscovy hens will build nests on the ground or in tree branches and both male and female are capable of flight.  English poultry author, Lewis Wright, was quoted describing the Muscovy as having a fowl temperament, however, this author has found her Muscovies to be rather more gentle than many of her Pekins and Rouens.  Mr. Babcock said in his article he found them to be quite the opposite as well.

Female Muscovies are known to be good sitters and have been used as incubators of chicken, duck and turkey eggs in France, Australia, and other countries, Australians reporting better hatch rates under Muscovy hens than under chickens or in mechanical incubators.  Muscovy eggs take 35 days to hatch.  When hens are about to sit they line their nests with feathers and down which they use to cover their eggs when they leave the nest to feed.  Your author’s biggest challenge in raising chicks of any sort is protecting the chicks from fire ants.

All primary sources consulted echo the sentiment that the Muscovy is a prolific breeder, and a voracious eater, but because it forages well and is not particular what it consumes it was considered profitable to rear.  It was agreed the Muscovy was found in the wild only in South America and in early sources was commonly called the Barbary or Guinea-duck.  Another commonality is that the Muscovy can have a strong musky smell from glands near its rump and it was advised to remove that area and the head as soon as the bird is killed, as opposed to the historical practice of allowing poultry to hang to age.  “It is then a very good dish, and as succulent as the wild duck”.

See:  “Southern Agriculturist and Register of Rural Affairs”.  Southern section of the United States.  Jan. 1831 and 1847.  “Treatise on the Breeding, Rearing, and Fattening of Poultry Chiefly Translated From the New French Dictionary on Natural History”.  London.  1810. Silverman, Helaine and Isbell, William.  “Handbook of South American Archaeology”.  2008.  Roberts, Victoria.  “British Poultry Standards”.  2008.

Croquettes: Tasty Pockets of Goodness©

18 Friday May 2018

Posted by thehistoricfoodie in 18th century food, 19th century food, Colonial foods, historic food, homesteading, Uncategorized

≈ Leave a comment

Tags

Croquettes

wikipedia

Photo:  Wikipedia

Salmon comes to mind when one thinks about croquettes, however, croquettes can be made out of any chopped meat – with or without potato and parsley, rice, pasta, grain, vegetable, fruit and even nuts.  They were, and remain, an economical way to turn left-overs into a tasty new dish.

Croquettes were were either made by hand shaping the meat mixture into a cone or flat cake or shaped in a croquette mold.  They were then dipped in egg, rolled in crumbs, and fried brown.  “The ideal croquette should be soft and creamy inside when served, and yet keep its shape, and be crisp and brown outside . . .The derivation of the word croquette hints at something crisp or crackling.”  Molds were first buttered then sprinkled with crumbs for the first croquette then subsequently sprinkled with crumbs before molding the remaining mixture.

“MYSTERY” CROQUETTES.  “Mrs. Owens’ New Cook Book”.  [This is an excellent recipe which can be used to make any sort of croquette.]  Take any bits of cold fish, flesh, or fowl, any or all, chop fine with 2 hard boiled eggs and ½ cup cold potatoes.  To a pint of the mixture add a raw egg, a scant tablespoon flour and a teaspoon of melted butter.  Form into croquettes; dip in egg and sifted crumbs and fry in hot fat.

CHICKEN CROQUETTES.  “Southern Cooking”.  1912.  For Chicken Croquettes.  To make one dozen croquettes.  Select three and one half pounds of chicken and boil well done, take the meat and chop very fine, use one pint of flour, 2 raw eggs, parsley, salt and pepper.  [Shape into patties and fry in butter.]

TURKEY CROQUETTES SEASONED WITH POTATO AND EGGS.  “Palatable Dishes”.  1891.  Cut the meat from one turkey, removing all fat, skin, gristle, and bones.  Mash about eight cold boiled potatoes.  Chop finely six hard-boiled eggs.  Mix these ingredients well together; add a gill of white wine, salt and pepper to taste.  Make into croquettes, and brown them nicely in butter, serving them very hot.

CROQUETTES OF CRABS.  “Palatable Dishes”.  1891.  One pint of solid meat.  After the crabs are boiled and the meat is picked out, measure it.  Put in a double saucepan, half a pint of cream.  Rub to a cream one heaping tablespoonful of butter and three heaping tablespoonfuls of sifted flour, then stir this into the hot cream gradually; stir rapidly until you have a thick, smooth paste.  Now add the beaten yolks of two eggs; take from the fire, then add one tablespoonful of chopped parsley, half a teaspoonful of onion juice, a pinch of cayenne pepper, one even teaspoonful of salt, and two hard-boiled eggs chopped very fine; mix thoroughly.  Now add the crab meat and set aside to cool; then form into little cones or pyramids, dip in egg and fine bread-crumbs.  Fry a rich brown in boiling hot fat, garnish with parsley or water-cress.  Serve hot with cream sauce.  Hard-shell crabs are the best for croquettes; it will take one dozen to make a pint of meat.

SAUSAGE CROQUETTES.  “Palatable Dishes”.  Take one pound of nicely seasoned sausage meat, two raw potatoes grated fine, half a cupful of grated bread-crumbs, one egg beaten light, one tablespoonful of chopped parsley or celery, three tablespoonfuls of milk, salt, and pepper to taste.  Mix all well together.  Make into little patties or rolls; fry in the spider [skillet] in a little half butter and lard.  Serve hot, garnished with parsley.

SALMON CROQUETTES:  “Mrs. Owens’ New Cook Book”.  1897.  One can salmon, an equal quantity of mashed potatoes.  Make into little cakes, roll in white of egg and rolled cracker and fry.

SALMON CROQUETTES:  “Mrs. Owens”.  #2:  One cup picked up salmon, ½ cup mashed potatoes and ½ cup bread crumbs.  Heat a cup of milk to boiling and stir into it 1 tablespoon butter made smooth with 2 tablespoons flour.  Add to this 1 tablespoon chopped parsley, the salmon, potato, and bread crumbs.  Season palatably with pepper and salt and pour into a buttered platter to cool.  Form into shapes, dip in egg and crumbs and fry in hot fat until brown.

GREEN [FRESH] CORN CROQUETTES.  “Mrs. Owens”.  1 quart young, tender, grated green corn, 1 cup sifted flour, 1 cup sweet milk, 2 tablespoons butter, 2 eggs, 1 saltspoon salt [to taste], and same of pepper.  Grate the corn [cut from the cob] as fine as possible, and mix with the flour, pepper and salt.  Warm the milk and melt the butter in it.  Add the corn, stir hard, and let cool.  Then stir the eggs beaten very light, the whites added last.  Work into small oval balls, and fry in hot fat.  Drain and serve hot.

SWEET POTATO CROQUETTES.  “Palatable Dishes”.  When boiled and mashed, take one pint and a half of the potato, mash them smooth, and beat into them three-quarters of a cupful of hot milk, one teaspoonful of salt, and three heaping gablespoonfuls of butter.  Beat two eggs light and add them to the mixture, beating in thoroughly.  Now form into croquettes.  Dip into egg, then bread-crumbs, and fry in hot fat until a rich brown.  Serve immediately.

POTATO CROQUETTES.  Season cold mashed potato with pepper, salt, and nutmeg.  Beat to a cream with a tablespoon of melted butter to every cup of potato.  Bind with 2 beaten eggs, and add 1 teaspoon minced parsley.  Roll into oval balls, dip in beaten egg, then in bread crumbs, and fry.

HOMINY CROQUETTES.  “Housekeeper’s and Mothers’ Manual”.  1895.  Soften a cupful of cold, boiled hominy or hominy grits, with a cupful of sweet milk and a well beaten egg.  Mix thoroughly and season with salt and butter and a dash of pepper.  Form into croquettes, dip in beaten egg and cracker dust and fry in boiling lard.

CHEESE CROQUETTES.  “The Warren Cook Book.”  1920.  2 cups grated cheese, 1 cup fine bread crumbs, salt and cayenne to taste; form into small balls; dip into beaten eggs and fine cracker crumbs; fry in boiling fat; serve with salads.

HAM CROQUETTES.  “How We Cook in Tennessee”.  1906.  Run cold boiled ham through meat chopper, also one hard boiled egg.  To every cup of ground meat put one cup rolled bread crumbs and one hard boiled egg.  Add pepper and nutmeg to taste.  When ready to use, wet up with sweet cream, make out in croquettes and fry.

BRAIN CROQUETTES.  “How We Cook in Tennessee”.  Two sets hog brains, two eggs, cracker crumbs.  Parboil the brains, allow them to cool, chop fine, beating in the eggs and a few crumbs with salt and pepper to taste.  Make into shapes, roll in crumbs and fry in hot lard.

Nutrition Through the Years©

28 Wednesday Mar 2018

Posted by thehistoricfoodie in 17th century food, 18th century food, 19th century food, Colonial foods, historic food, homesteading & preparation, Self-sufficiency, Uncategorized

≈ 1 Comment

Tags

plantain, wild greens

plantain-002

plantain-004

plantain-005

Fresh plantain harvested from the author’s yard and flavored with ham

Americans have grown fat and lazy in recent generations, many living off processed food that is high in calories while providing little nutrition.  Obesity and diabetes accompanied by hypertension are at epidemic proportions even in our children.  The fault lies with parents who allow children to live in this manner.  A child that is taught to eat well will usually do so for life.

In times past, children ate what adults ate and were healthier for it.  God and Nature provided nutritious food but somewhere along the way most Americans got lazy.  First they found it easier to shop at markets and roadside stands with a limited selection of fruits and vegetables, proprietors’ goals being to profit from what shoppers were more likely to buy, then in the last couple of generations many have been willing to forego nutrition altogether for the convenience of pre-made meals.

Even families who are conscious of nutrients may have fallen into the abyss of white flour and sugar.  Your author had an awakening this year that prompted the removal of such ingredients from our diet.  Bulk wheat berries and a grain mill have replaced the worthless processed flour and honey is going a long way toward replacing sugar.  Our garden has for some time now provided fresh produce and berries.  The reward for me has been weight loss, lower blood sugar, and manageable hypertension.

Let’s look at eating habits of our forebears and how families sought nutritious food even during eras of inflation.

“I think we keep well by using a great many wild greens that are so plentiful in the spring—why, when I drive along the roadside I have a basket and knife with me because I want those wonderful greens.  I go up town and do my marketing early in the morning, and I take my knife along and my basket, and on my way home I have a mess of greens.  Children are very fond of them, small children—at least I find it so at my table”.

“Children were dispatched to gather wild greens – wild mustard, tongue grass, snake’s tongue, young poke shoots, Shawnee, wild lettuce, ‘mouse’s ear’, speckled dock, lady’s slipper, little dock, elder leaves, wild ‘cresses’ and other ‘sallet greens’ were growing everywhere.

A dandelion salad, which all Germans like, is in itself a most wholesome food.  We could never taste it as made by Germans; however, because they use bacon-fat to dress the leaves with.  Olive oil and lemon juice can take the place of their hot bacon fat and vinegar.

The cresses, dandelion, radishes, scullions, lettuce, horseradish, chives, pusley [purslane], asparagus and various field greens, can be used in their native state in salads to great advantage.

Chopped dandelion leaves and asparagus tips, with green onion tops, dressed with French dressing, as little condiment as possible, using lemon juice and not vinegar for the dressing, is a most healthful salad.  Eaten with a slice of unfermented bread with a handful of nuts, it makes a sufficient and wholesome meal for spring.

There are salads for every month in the year.  A delicate salad for August, made of nasturtium flowers and leaves, flaked nuts, tomato and other delicate combinations which might grace the salad course of a sixteen course dinner and do honor”. – 1909.

Let’s take a look at how these wild greens were being prepared and served.  “The wild greens, such as the dandelion, mustard, and the cowslip are much improved by boiling them with a piece of salt pork striped lean and fat.  A slice of the pork cut very thin should be served with each dish of greens.  Beet greens also may be prepared in this way.  One of the most appetizing meals I can think of is made of hot sliced boiled ham or corned beef—a piece of corned brisket is suitable for this—a dish of greens, new potatoes boiled in their jackets with the greens and ham, and rhubarb pie for dessert”.

Except, perhaps, for rhubarb which likes to grow in cooler temperatures, Southerners have served up such meals since colonization began.  Blissful Meals, y’all. © Text and photos copyrighted by the author.

  • The Vegetarian Magazine.
  • The American Child.
  • The Delineator. May 1922.
  • Year Book. Illinois Farmers’ Institute.

GREEN UP TIME IS HERE©

16 Friday Mar 2018

Posted by thehistoricfoodie in 19th century food, historic food, homesteading, period food, Self-sufficiency, Uncategorized

≈ 3 Comments

Tags

green up time


“In green-up time our fathers go afield

To plow the stubborn slopes their fathers plowed

Planting in green-up time gives greater yield

They work in sun beneath the wind and cloud.

In green-up time our mothers walk by streams

To pick the water-cresses from creek bottom…”

dandelion-greens

So go the lyrics to a poem about Kentucky, lyrics which probably described farms all through the country.

Green-up time is a colloquialism for spring when plants emerge from beneath the earth and bask in the warm sunshine.  One can look through the woods and see a pale green color in the trees as leaves begin to put out.  It also refers to the time when winter grown plants “green up” with warmer weather as with winter wheat.  In the early 20th century Agricultural Bulletins farmers reported on when the grasses and wheat began to green up each spring.  When families raised their own food grass to feed farm animals was as important as plants to feed families.

“Everything looked hopeful.  The garden was greening up beautifully; the hens were laying or sitting; we should be all right if we could keep our heads above water and keep out of debt.”

In times past when families had nothing but canned, salted, dried or smoked food from fall to mid-spring green-up time was eagerly awaited so that the enlightened country cook could gather from Mother Nature’s store house a variety of fresh greens.  Whether cooked separately or several varieties combined to make enough for a “mess”, those greens were mighty welcome especially when prepared with some side meat or bacon grease and served with hot cornbread.

“Soon after sassafras time, it was green-up time, with the first shoots coming up out of the ground.  We watched the sprouts hopefully, for this was the time of year for Granny to go to the fields and woods to pick her wild greens, the “sallets” of the old frontier. Granny Fanny taught us all the plants, and how to tell the good greens from the bad. We gathered new poke sprouts, always being careful not to snip them too close to their poison roots; and we gathered “spotted leaf,” leaves of “lamb’s tongue,” butter-and-eggs, curly dock, new blackberry sprouts, dandelions, and a few violet leaves.

Green-up time was also ramp season, but Mama wouldn’t let a ramp come into the house, for the ramp is a vile-smelling wood’s onion whose odor, like memory, lingers on. Some of our neighbors and cousins hunted ramps every spring and carried them home in gunnysacks to boil and fry.  In the spring down at school, the teacher would sometimes have to throw the windows wide open to air out the smell of ramps, wet woolen stockings, and kid sweat.”  — McNeill.

Greens meant different things to different people depending on where they lived but probably the most common included poke, dock, dandelion, nettles, cowslips, chickweed, lamb’s quarters or pigweed, milkweed, plantain, purslane, watercress, ramps, mallow, mustard, greenbriar, chicory, sorrel, bracken, clover, young blackberry shoots, etc.  Dandelion is an excellent example of a green that escaped its boundaries and began to grow wild.

Sometimes turnips left in the field would throw up new greens when the weather turned nice and these could be added to the mix.  Cabbage and collard stalks that weren’t treated too badly by Old Man Winter likewise produced sprouts for the pot.  While usually not technically a wild food, young hop tops were common greens.

Perhaps the most often eaten wild plant in my family was poke.  The tender young shoots were parboiled, then cooked with meat or drippings, and when a little larger the stalks were peeled, sliced, battered, and fried like okra.  Foragers today think they’re going to die if they eat poke, but if that were true few country families would have survived the Depression era.  In the spring mama even canned and froze it to last through the year.

“Poke Sallet and Branch Lettuce.  Cowskull Mountain.   This is the time of year in the hills when the jaded appetite turns to turnip greens and poke sallet, speckled dock and branch lettuce. To mountain folks, weary from a dreary winter-long diet of store bought vittles, it is a very special season. They call it green–up time. And in the hills green–up time, which comes when spring starts bustin’ out all over, sends folks into the old fields and along the branches in search of wild greens.”

Before I wish you my usual Blissful Meals, I will beseech you to get out this weekend and enjoy green up time.  While out and about look for those first tender leaves of spring and consider feasting as your grandparents probably did.

Bib:  Stuart, Jesse.  “Kentucky is My Land”.  1952.

McNeill, Louise.  “The Milkweed Ladies”, page 45 and 46.

Parris, John.  “These Storied Mountains”.  1972.

“Saturday Evening Post”.  April 15, 1911.

Kitchen Style That Reaches Out to Me

12 Monday Mar 2018

Posted by thehistoricfoodie in 17th century food, 18th century cooking, Colonial foods, early household items, historic food, medieval food, open hearth cooking, Uncategorized

≈ 1 Comment

This post isn’t going to be long on text and is offered today just because I took a sentimental journey and decided to share images of kitchen styles that make me happy.  I’ve had the pleasure of cooking in some interesting settings and making food my ancestors would have been comfortable with, but at 60, I’m not sure if I’d want to take up cooking for 25 or more people as I once did in primitive settings.  Putting a joint on the spit and making some historical dish for the Mister and myself, however, will bring me immense pleasure when we get around to tweaking our keeping room.  We have pieces a plenty to outfit it once we are ready to transform the interior into the setting we want.  It doesn’t have to be nearly as elaborate as these to please me as I gravitate more toward cottage than castle, but the reader will enjoy this nostalgic trip down memory lane.

6e36ae8d706f626dd75509fff2ea3718

best_92ed964ae3865d23a518_15_carter_house4_1_

French chateau

french-kitchen-6, Becoming Madam blog

Chirk Castle, Wales

home in Ireland

Ireland 1865

unknown location

Linsfort Castle, Inishowen County, Donegal

Blissful Meals now and perhaps you’ll find a few details in these images that speak to you as they have me.  I’ve tried to avoid copyrighted images, however, it was sometimes hard to follow the chain of postings to know who the original poster was and whether there were any restrictions on using the photo.

← Older posts

Archives

  • October 2020 (2)
  • August 2020 (2)
  • July 2020 (2)
  • March 2020 (1)
  • July 2019 (1)
  • March 2019 (1)
  • February 2019 (4)
  • January 2019 (1)
  • October 2018 (1)
  • September 2018 (1)
  • August 2018 (2)
  • July 2018 (1)
  • June 2018 (2)
  • May 2018 (3)
  • April 2018 (2)
  • March 2018 (7)
  • February 2018 (1)
  • December 2017 (3)
  • November 2017 (1)
  • September 2017 (2)
  • June 2017 (1)
  • May 2017 (1)
  • March 2017 (1)
  • February 2017 (4)
  • January 2017 (1)
  • December 2016 (2)
  • October 2016 (2)
  • August 2016 (5)
  • July 2016 (2)
  • June 2016 (3)
  • May 2016 (7)
  • February 2016 (1)
  • January 2016 (8)
  • September 2015 (2)
  • July 2015 (1)
  • February 2015 (3)
  • January 2015 (2)
  • December 2014 (1)
  • November 2014 (2)
  • October 2014 (3)
  • August 2014 (6)
  • July 2014 (8)
  • June 2014 (8)
  • May 2014 (11)
  • April 2014 (4)
  • March 2014 (5)
  • February 2014 (4)
  • January 2014 (4)
  • December 2013 (3)
  • November 2013 (2)
  • October 2013 (4)
  • September 2013 (8)
  • August 2013 (1)
  • July 2013 (10)
  • June 2013 (2)
  • May 2013 (3)
  • April 2013 (10)
  • March 2013 (4)
  • February 2013 (3)
  • January 2013 (13)
  • December 2012 (13)
  • November 2012 (4)
  • October 2012 (1)
  • August 2012 (3)
  • July 2012 (12)
  • June 2012 (5)
  • May 2012 (5)
  • April 2012 (4)
  • March 2012 (8)
  • February 2012 (1)
  • January 2012 (5)
  • December 2011 (10)
  • November 2011 (2)
  • October 2011 (3)
  • September 2011 (4)
  • August 2011 (7)
  • July 2011 (10)
  • June 2011 (6)
  • May 2011 (1)
  • March 2011 (1)
  • December 2010 (2)
  • November 2010 (2)
  • October 2010 (3)
  • December 2009 (1)
  • June 2009 (13)
  • May 2009 (10)
  • April 2009 (9)
  • March 2009 (1)

Enter your email address to subscribe to this blog and receive notifications of new posts by email.

Join 516 other followers

Blog at WordPress.com.

Cancel

You must be logged in to post a comment.

Loading Comments...
Comment
    ×
    Privacy & Cookies: This site uses cookies. By continuing to use this website, you agree to their use.
    To find out more, including how to control cookies, see here: Cookie Policy